Showing posts with label ADV. Show all posts

Tuesday, July 5, 2022

Review: Adventure Spec Supershirt

Another type of tail tidy...

If you've been following up-and-coming UK ADV gear company Adventure Spec, you'll be aware that for the past two years they've been developing an armoured shirt to meets Europe's stringent AA standard for motorcycle protective gear. Last year, Adventure Spec revealed their development program and offered early adopters a chance to get one of the first production items. I immediately plunked down a buck to hold a place in the pre-order line. Today, after a year of development delays and then a website ordering demand that appeared to have set servers on fire, I finally was able to purchase and receive one of only 48 or so "Supershirts" allocated to North American customers. While I haven't had a chance to ride in the shirt yet, here are some initial observations that may help you determine if this is the right gear for you when the Supershirt is officially launched and inventory becomes available later this summer.

For reference, I'm 183 cm tall (6'-1") and 91 kg (200 lbs) of generally athletic build, but carrying a bit more middle than usual. My chest is 107 cm (42") and waist about 88 cm (34"-35") depending on pants and how many tacos I've just eaten. For most riding gear I seem to fit a Large, so that's the size of Supershirt I ordered. It fits perfectly: snug but not uncomfortably tight, with perfect sleeve length to slot my thumbs in the holes and not have wither bunched fabric or numb thumbs.


Adventure-Spec does not seem to have listed technical details of the Supershirt on their web site, and I'll leave it to them to do that. Here I'll only cover my observations and first impressions.


The first thing I noticed is the surprising weight of the shirt. Mine weighs 1710g in Large, although the tag indicates 1670g. The material is tough and stretchy, and a little coarse. It appears to be two types of fibre woven together with the outer face material (which is dark gray to almost black) probably an aramid abrasion material and the inner layer (light gray) being more of a comfort/structural layer. It is not a mesh structure: you can barely see light through it and only if the light is bright and you stretch the material. 


Given the roughness of the weave, it should allow sweat to escape reasonably well. Wearing the shirt with a 150-weight Merino wool T-shirt on underneath, I found it warm but not uncomfortable in my workshop's ambient temperature of 24C with high humidity (it was raining). I didn't find the inner material to be uncomfortable or grabby on my hairy arms. 

The Forcefield armour is all Level 2 and substantially thicker than the Level 1 armour in my 2018 Klim Carlsbad jacket. When putting on the Supershirt, I find I snag my fingers on the pockets inside the sleeves that hold the armour. One solution would be to add some Velcro to hold the pockets closed (and reduce the risk of tearing them) but for now the snagging just feels like a minor annoyance that I can avoid with practice. 

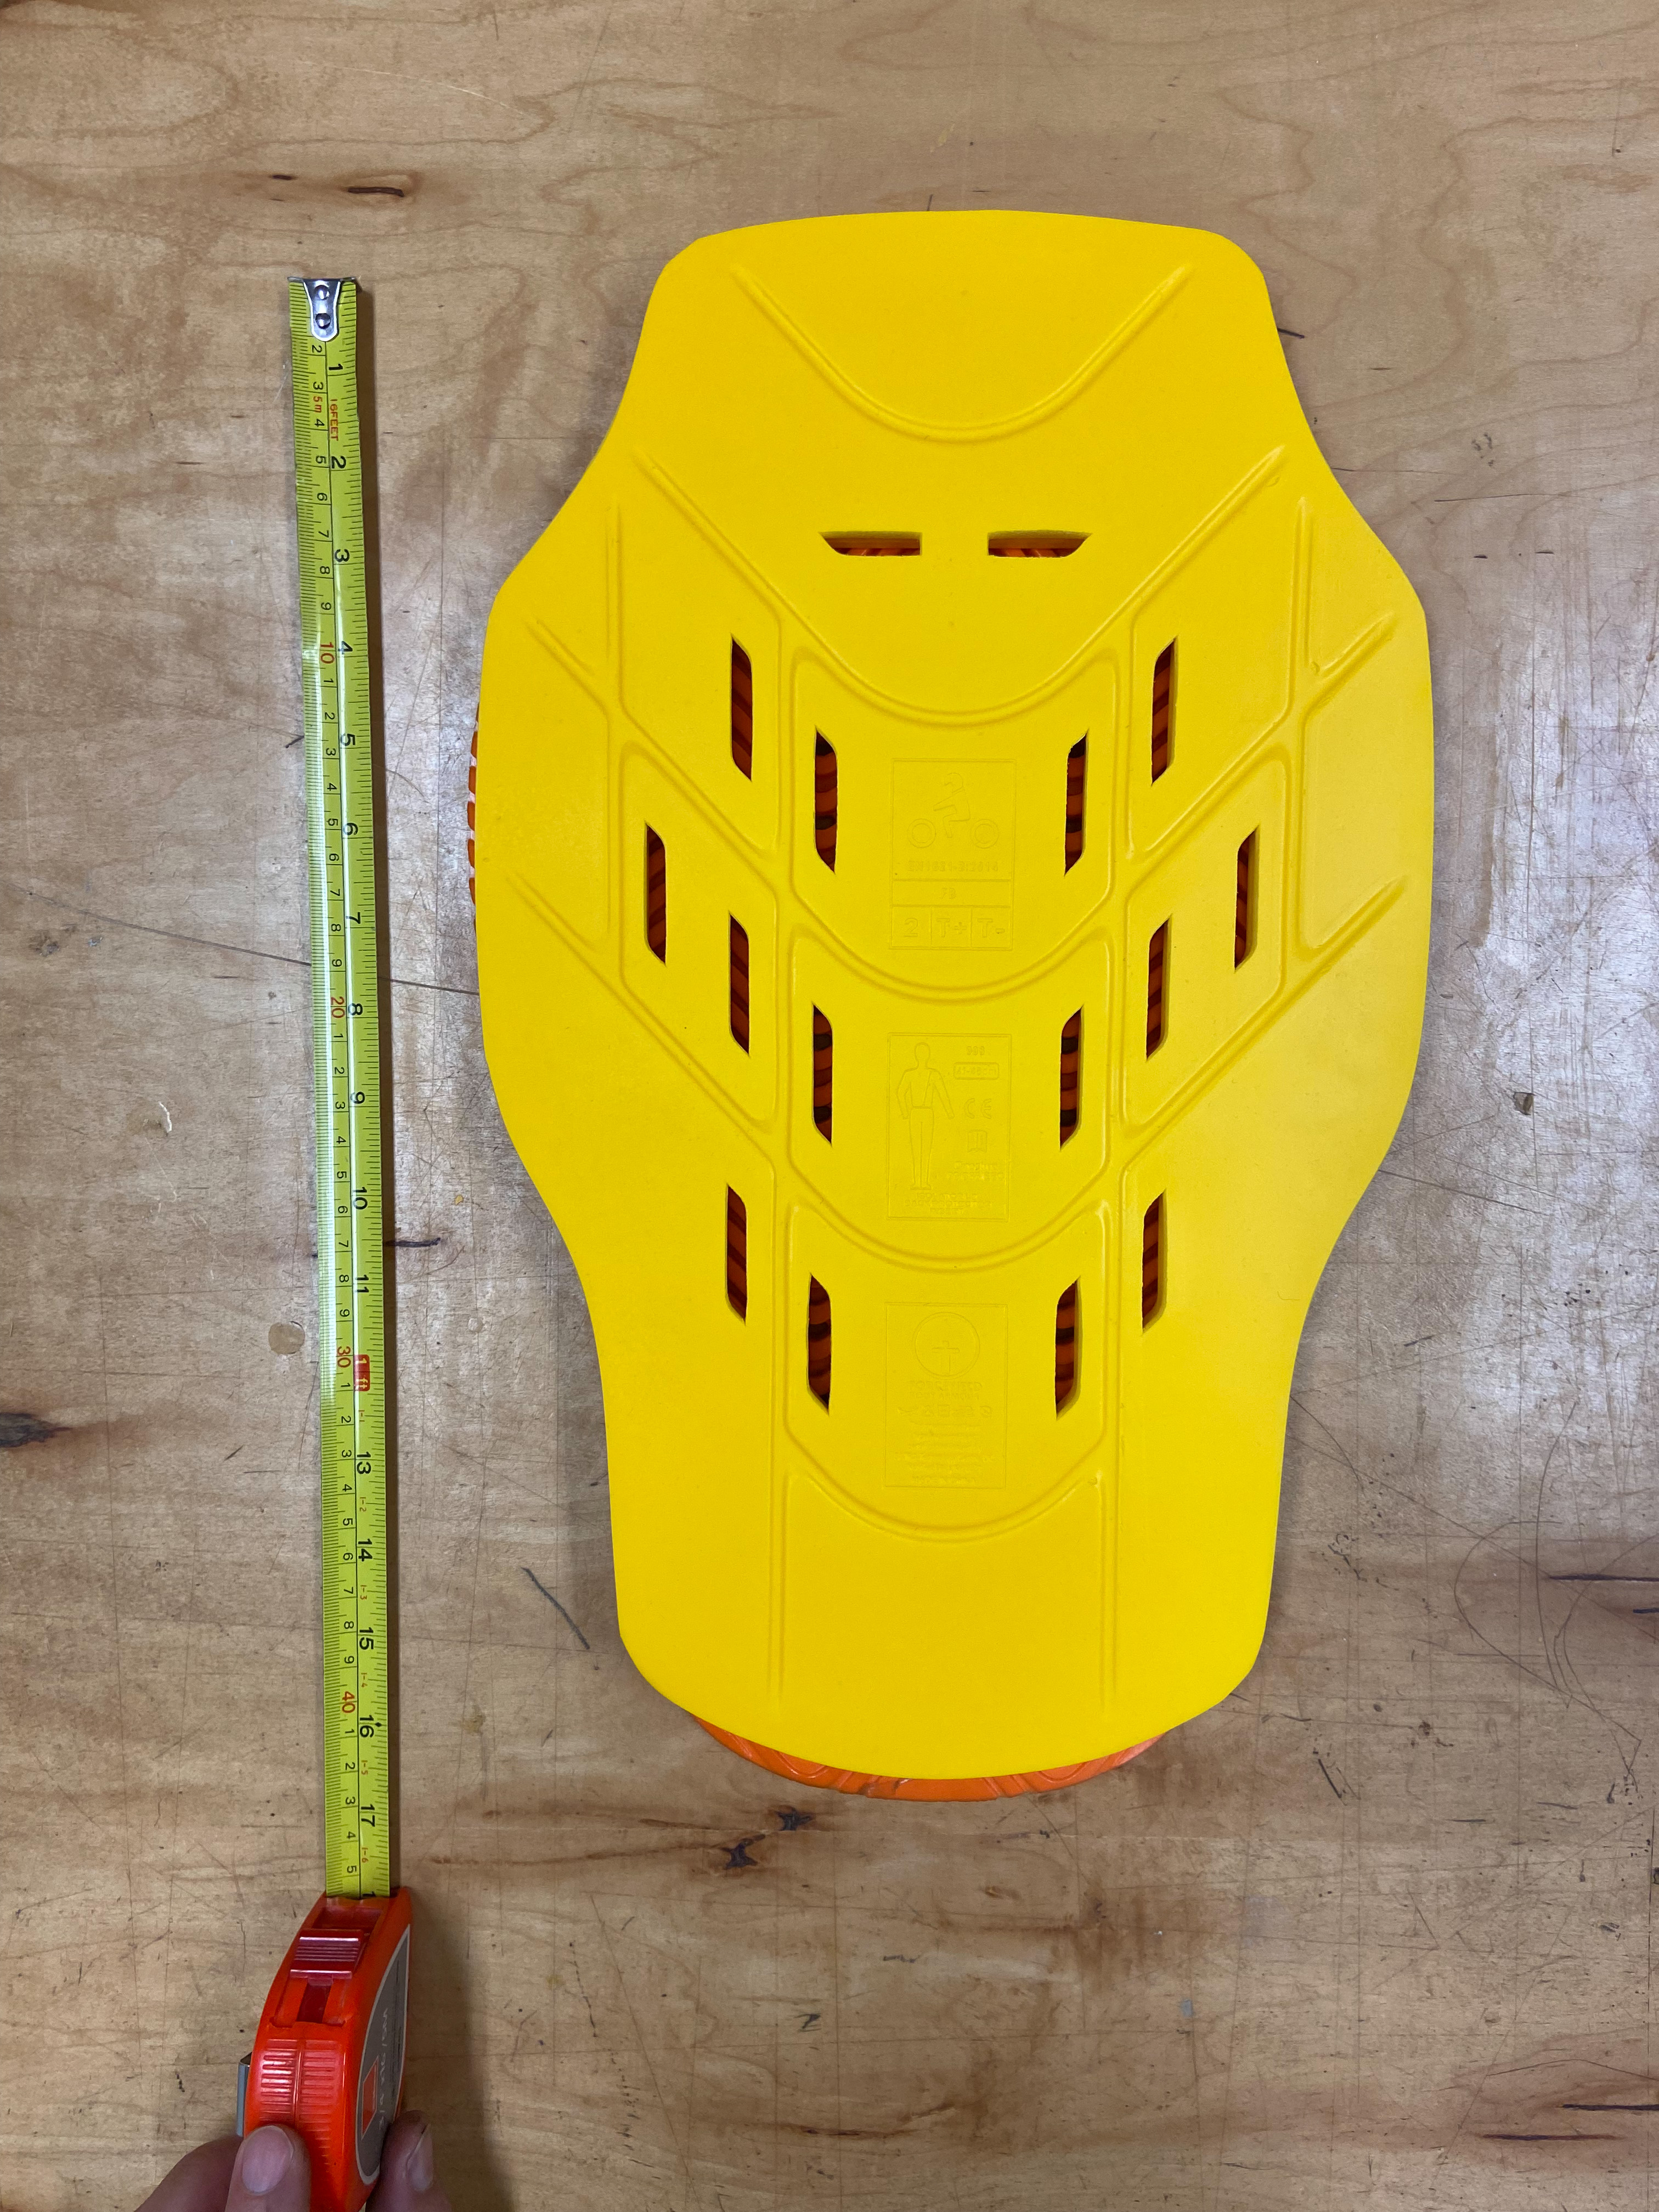
The back armour does not extend to the lumbar region and I immediately noticed this when I first put on the Supershirt. It felt much shorter than the D3O armour in my Klim jacket, but measuring proved me wrong. However, it is significantly shorter than the back armour in my AlpineStars armoured shirt shown in the pic below (more on this shortly).

Back protector is about 16.5" long.

The AlpineStars back protector extends over the lumbar region. 

The AlpineStars jacket/shirt makes an interesting comparison to the Supershirt because like the Supershirt, it has back, shoulder, elbow, and chest protection--as well as a kidney belt. However, it is clearly not designed to be worn as an outer layer and I've mainly used it under my Klim jacket or a Klim Pro jersey which is tougher than a regular jersey. The AlpineStars mesh has proven to be quite fragile under normal wear. It's torn just putting on the garment, so I've been reluctant to wash it.

The AlpineStars mesh is fragile and the armour isn't removable. 

Here's the Supershirt's Forcefield armour compared with the Klim D3O.


The back protectors are almost identical in shape and size.

The Forcefield is about twice as thick as the D3O, as needed to get that Level 2 protection (versus the Level 1 of the D3O). 


While the back, elbows, and shoulders all use the same yellow armour, the chest uses three layers of black material bonded together in the centre. 


All of the armour feels like the type that hardens under impact. I imagine it'll conform nicely to my anatomy once it's warm and I've worn the shirt for a while. 

The elbow and shoulder protectors are also similar to those in my Klim jacket, although twice as thick and Level 2 versus the Klim D3O's Level 1. 


Here's how the Supershirt fits with just the light T-shirt on underneath. (Where'd that belly come from?!) On a hot day, I'd probably ditch the T-shirt because the Supershirt is going to get sweaty anyway, so why create more laundry?


The Supershirt fits under my Klim Carlsbad jacket (size Large; armour removed) just fine, and I didn't feel that mobility was too restricted. I don't know how the current CE-rated Klim Carlsbad compares, but I would think that its improved forearm design helps mobility. I never really liked how the forearm zips work on my 2018 jacket: they're impossible to zip up without stopping my ride and removing my gloves so I can hold the ends of the jacket sleeves. Won't need to bother with that when wearing the Supershirt!


The Klim jacket with armour removed weighs 1310g. Adventure Spec offers their "Singletrack" waterproof jacket which weighs 710g. While I agree with Adventure Spec's philosophy of "light is right", the combination of Supershirt and Singletrack jacket weighs 2412g compared to 2010g for the Klim Carlsbad with armour in. Of course, with the Adventure Spec combo you're getting certified Level 2, AA protection (versus Level 1 for the Carlsbad) as well as a chest protector. The additional protection comes with a weight penalty. I think the main advantage of the Supershirt in this case is you don't need the jacket: the shirt alone serves as the outer layer. So really, you're comparing a lighter, breathable (but not waterproof) protective layer with a waterproof (but not breathable) and heavier jacket. 

While the Supershirt should be great for hot-season riding, what about shoulder seasons or cold days when you need heated gear? Here's my First Gear 90W heated jacket over the Supershirt. No significant mobility issues. 


Of course, it's unlikely I'd wear just the heated jacket over top (although that's an interesting idea to test). So here's the whole shebang layered with the Klim on top. 


This made me feel more like a sausage and my forearms were noticeably less comfortable. But it does work, and usually when it's cold and wet for me (like 10 hours of rain at 8C) it's because I'm stuck on a long highway run and not trying to navigate technical trails where more mobility is required.

To meet AA protection requirements, the Suupershirt sleeves require thumb loops. No discomfort using them inside my Held Steve gloves (size 9.5 Long, by the way--fantastic gloves).


One thing that doesn't seem to work with the Supershirt is my Atlas neck brace. I have the brace adjusted to fit over my Klim jacket, so it may be possible to readjust it to open a bit wider on the Supershirt. As it is, the brace doesn't sit on my shoulders, even with the chest strap. It just springs up. I don't always wear the neck brace (it interferes with my Kriega R15 pack), but it would be great to have the option and have it be comfortable. 


Speaking of necks, if Adventure Spec is reading this (hi Greg!) I recommend scooping the front of the neck hole lower by about 1cm. It's in just the right position to chafe a little bit, but that may ease up as my Supershirt breaks in. 

Overall I'm impressed with the quality of this shirt and would summarize it as follows.

Pros:
  • It's one, breathable layer offering CE AA protection. Wow! I anticipate this transforming how I enjoy my riding, especially in hot weather. 
  • It's comfortable to wear but tough material. Construction quality is high.
  • Armour is well placed and held snugly in position. 
Cons (well, suggestions really):
  • Although the garment has been tested and certified to meet the CE AA rating, I'd like to see the back protector extend to the lumbar region as that can be a high-impact area (as with the tail bone) in trail riding. 
  • Neck hole could be a wee bit lower in front.
  • Armour pockets could use a tweak so fingers don't snag so easily on them.
  • Adding a second, lower pocket pouch for the back protector (or a Velcro sizing adjuster in a single, larger pouch) could allow the use of a longer back pad for lumbar protection if desired. 
  • Adding a couple of Velcro strips on the back would make it easy to attach an optional kidney belt (a.k.a. belly modifier...ahem).
  • Cost. I received a "VIP" discount as a result of being an early-adopter a year ago and feel the price even at full retail is fair considering the quality of the garment. However, as a Canadian, the combination of USD to CAD exchange rate coupled with an exorbitant shipping/brokerage fee from UPS ($160!), taxes, and duty brought my final price to CAD$568.81--almost double the cost of the shirt. The regular retail cost to Canadians will be significantly more than that (no VIP discount). In my experience with ordering international goods shipped to Canada, it's often been much cheaper (and faster) to order direct from the EU, Japan, or Australia than from the US. I would like to see more vendors offer Canadians more fulfillment options. I raised these points with Adventure Spec and they recognize the issue and are considering options.  
Major kudos to the team at Adventure Spec for launching the Supershirt. Version 1 looks great and I'm really looking forward to seeing how it works out over time.  I'll try to update this review later this summer once I've had a chance to do some long rides with it.

Wednesday, June 30, 2021

Tenere 700 - Suspension tuning update - Vast improvements!

Riders looking to get more practical performance out of their bike (whether motorcycle or bicycle, for that matter) are wise to first invest in tires and then suspension. Suspension tuning is especially vital to getting the most from your ride. Unless you fit the manufacturer's narrow criteria for rider weight (and many Japanese bikes are under-spring from the factory), chances are your bike will not handle as well as it could--especially on rough terrain.

Accelerated Technologies just north of Peterborough, Ontario, specializes in suspension tuning for all manner of vehicles, but especially sleds, ATVs, and motorbikes. John Sharrard, the brains and owner of the operation, is a former professional racer with championship titles to his name as well as some serious chops as a factory race tech for Honda and Yamaha. He had previously worked magic on my WR250R, completely transforming its off-road and on-road handling. Thus inspired, I was eager to bring him my 2021 Tenere 700 at the end of my first season with the bike, looking for a similar transformation. 

Having read countless online discussions about tuning the Tenere, a clear consensus emerged on the limitations of the factory setup. Mainly: the rear is under-sprung for riders above 165 lbs; putting in a stiffer shock spring requires additional damping beyond what the stock valving will achieve; and there are many complaints with high-speed compression damping front and rear. In addition, many people report that the clickers (fork and shock) have a much narrower range of effectiveness than the total number of potential clicks would suggest--imposing further limits on what damping you can achieve with the stock valving. Unfortunately, you need to modify the suspension if you're heavier than 75kg/165lbs and you plan to push the bike around in the dirt as it was intended to be used. 

For reference, I'm 91kg/200lbs in my birthday suit and 104kg/230lb in my riding suit. The tuning plan was to choose springs based on just me on the bike with no luggage and no preload applied so I'd have maximum range on the preload adjustment for when carrying luggage. That meant changing the shock spring. Interestingly, his sag measurements suggested that the factory fork springs were sufficiently rated--a bit of a surprise to me, given some of the online discussions I'd seen. 

Originally, I had installed an 80N-m shock spring from Rally Raid as well as the Rally Raid preload fork caps. While the stiffer shock spring reduced bottoming, John's opinion was that it still wasn't stiff enough. In fact, he noted that my shock appears to have bottomed even without luggage, so he wondered if that was the source of the harshness I'd felt. (However, I suspect the o-ring was in its lowest position based on other work I'd done.) John also felt the Rally Raid spring was the wrong dimensions for the application, so he replaced it with a longer version rated to 98N-m. As for re-valving, we agreed on a linear strategy to stiffen up the compression damping front and rear. This can be tricky to get right with a progressive linkage in the rear, so we just had to try something and go from there. 

By the time the first re-valving was completed, it was winter (-20C and snow) and unsafe to do a proper test ride. So I had to wait until spring to finally try it. Unfortunately, as soon as I hit the bumpy spring roads, I found the new setup to be extremely harsh. Low-speed compression damping could be managed by the clickers, but high-speed compression damping was so harsh that the bike would catch air off small expansion joints. Dirt roads and stutter bumps were a nightmare to ride at all but the lowest (or unsafely highest) speeds. And hitting any minor pothole or rock was like getting a 2x4 in my backside--leading to a wipeout on one trail that was obviously caused by the wheels pinging off ruts instead of rolling through them. Forget about hitting a pothole while cornering. The bike was simply far too harsh to ride for any length of time except on the smoothest roads or while standing. The high-speed compression damping needed to be dialled way back--but at least we now had some goalposts to work from. 

Below are the shock and fork setup notes from Accelerated Technologies. The details may be a little hard to decipher, so I've tried to decipher them below.


Shock tuning

Factory shock valving (9 valve shims):

  • 34 x 0.15
  • 32 x 2.0
  • 30 x 0.20
  • 28 x 0.20
  • 26 x 0.20
  • 22 x 0.20
  • 20 x 0.25
  • 20 x 0.25
Shock revalving attempt #1 (done at end of first season; red indicates the changes from factory):
  • 24 x 0.10
  • 32 x 2.0
  • 30 x 0.20
  • 28 x 0.20
  • 26 x 0.20
  • 22 x 0.20
  • 20 x 0.20
  • 18 x 0.20
  • 16 x 0.20
  • Washer

As noted, this setup was way too harsh and unrideable. Not recommended! Back to Accelerated Technologies for round #2. This time I rode my bike there and back - 650km in a day, to allow for testing. I brought my camping gear and set up in the back lot while they worked on my bike. Happy company with Bear, the shop dog, who was probably more interested in my lunch. 

Shock revalving attempt #2 (only 8 valve shims):

  • 30 x 0.20
  • 28 x 0.25
  • 26 x 0.25
  • 24 x 0.25
  • 22 x 0.25
  • 20 x 0.25
  • 18 x 0.30 (qty 2)
Fork tuning

Factory fork compression valving:
  • 16 x 0.10 (qty 5)
  • 12 x 0.10 (transition)
  • 16 x 0.10
  • 14 x 0.10
  • 12 x 0.15
  • 10 x 0.15
  • 16 Washer
Fork compression re-valving attempt #1 (red indicates changes from factory):
  • 16 x 0.15
  • 16 x 0.10 (qty 5)
  • 12 x 0.10 (transition)
  • 16 x 0.15
  • 15 x 0.10 (qty 4)
  • 14 x 0.15
  • 12 x 0.15
  • 10 x 0.15
  • 16 x 0.30 washer (qty 2) to expose more threads for additional shims

Note: the above tuning was too harsh, but not as bad as the shock felt. 

Fork compression re-valving attempt #2:

  • 16 x 0.15
  • 16 x 0.10 (qty 4)
  • 10 x 0.10 (transition)
  • 16 x 0.10
  • 15 x 0.10 (qty 2)
  • 14 x 0.15
  • 12 x 0.15
  • 10 x 0.15
  • 16 x 0.30 washer (qty 2) - Note: not sure if this was added in the revised stack
Factory fork rebound damping:
  • 16 x 0.10 (qty 5)
  • 10 x 0.10
  • 16 x 0.10
  • 14 x 0.10
  • 12 x 0.10
  • 10 x 0.10
  • 8 x 0.15
Fork rebound damping attempt #1 (changes in red; this worked well, so we didn't adjust it during second re-valving)
  • 16 x 0.15
  • 16 x 0.10 (qty 5)
  • 10 x 0.10
  • 16 x 0.10
  • 14 x 0.10
  • 12 x 0.10
  • 10 x 0.10
  • 8 x 0.15
Forks used 100mm of Motul 5 Wt full synthetic fork oil. As John said, if you're not sure what level of oil to choose, go with 100mm because it is almost always perfect, leaving you just enough air as a bumper. 


Setup #2 works very well, as I discovered first through several kilometres of testing with an unladen bike on a forest road near the shop, while stopping frequently to assess maximum suspension travel on the shock and forks. Grip on loose surfaces (especially uphill and downhill) was vastly improved, as was overall handling and braking. (On a historical note, this forest road is known locally as the "Oregon Trail". It's the original road allowance and homesteader trail for what later became County Road 39, located nearby. Gotta love those "lost" roads!)


On the ride home, I gave the fully laden bike (with five clicks of preload) a real workout on a mix of rough pavement and over 100km of rough forest roads. Again, the bike handled brilliantly under all conditions,  and used up the full range of suspension travel without noticeable bottoming, as evidenced by the position of the o-rings on the fork and shock.


It wasn't cheap, but it was well worth the expense to tune the Tenere in this manner. If I was to spend more money on tuning, it would be to upgrade the pistons for better bottoming feel. But realistically, I'm not a hard rider. Most of my riding is in the range of 50-100km/hr on dirt roads, with my sweet spot between 40-80 km/hr so I can enjoy the scenery. While I'm not taking jumps or looking to thrash my bike, I do insist on having the wheels follow the ground when they're supposed to ensure control. For me, the investment has resulted in a great setup and a lot more confidence on mixed surfaces.

Friday, December 25, 2020

Passages - A short ADV movie

Once again, the combined demands of work, family, and the pandemic have kept me away from posting updates, but I can assure you there's some good stuff to come. This past summer was spent riding as much as possible, exercising the Tenere and getting the suspension tuned, filming some rides, and prepping for another edition of the Ride Around Algonquin Park (RAP)--this time in a much more expanded loop up to Timmins, and with my two riding buddies from our 2018 Continental Divide Ride. More to tell about all that later.

Meanwhile, I've also been learning how to use Final Cut Pro to make movies and have just completed my first exercise which revealed a lot more learning is required. Anyway, I'm happy with the results--except for a few glitches which I had fixed but then must've accidentally undone before finalizing. 

So here it is. Enjoy!


Thursday, August 13, 2020

Tenere 700: Tie-down bracket on passenger foot pegs for soft luggage

The set of Enduristan Blizzard XL soft saddlebags I'm fitting to my Tenere require a tie-down point at the passenger foot pegs. Since I'm not using and have removed the passenger foot pegs, I need a place to loop the lower bag straps since I don't want them wrapping directly around the frame (that'll wear through the finish). R&G Racing offers a nice pair aluminum tie-downs like the one below, which bolt into the foot peg holes. Nice design, but also about CAD$130 and overkill for my needs.

I opted to make my own brackets.  

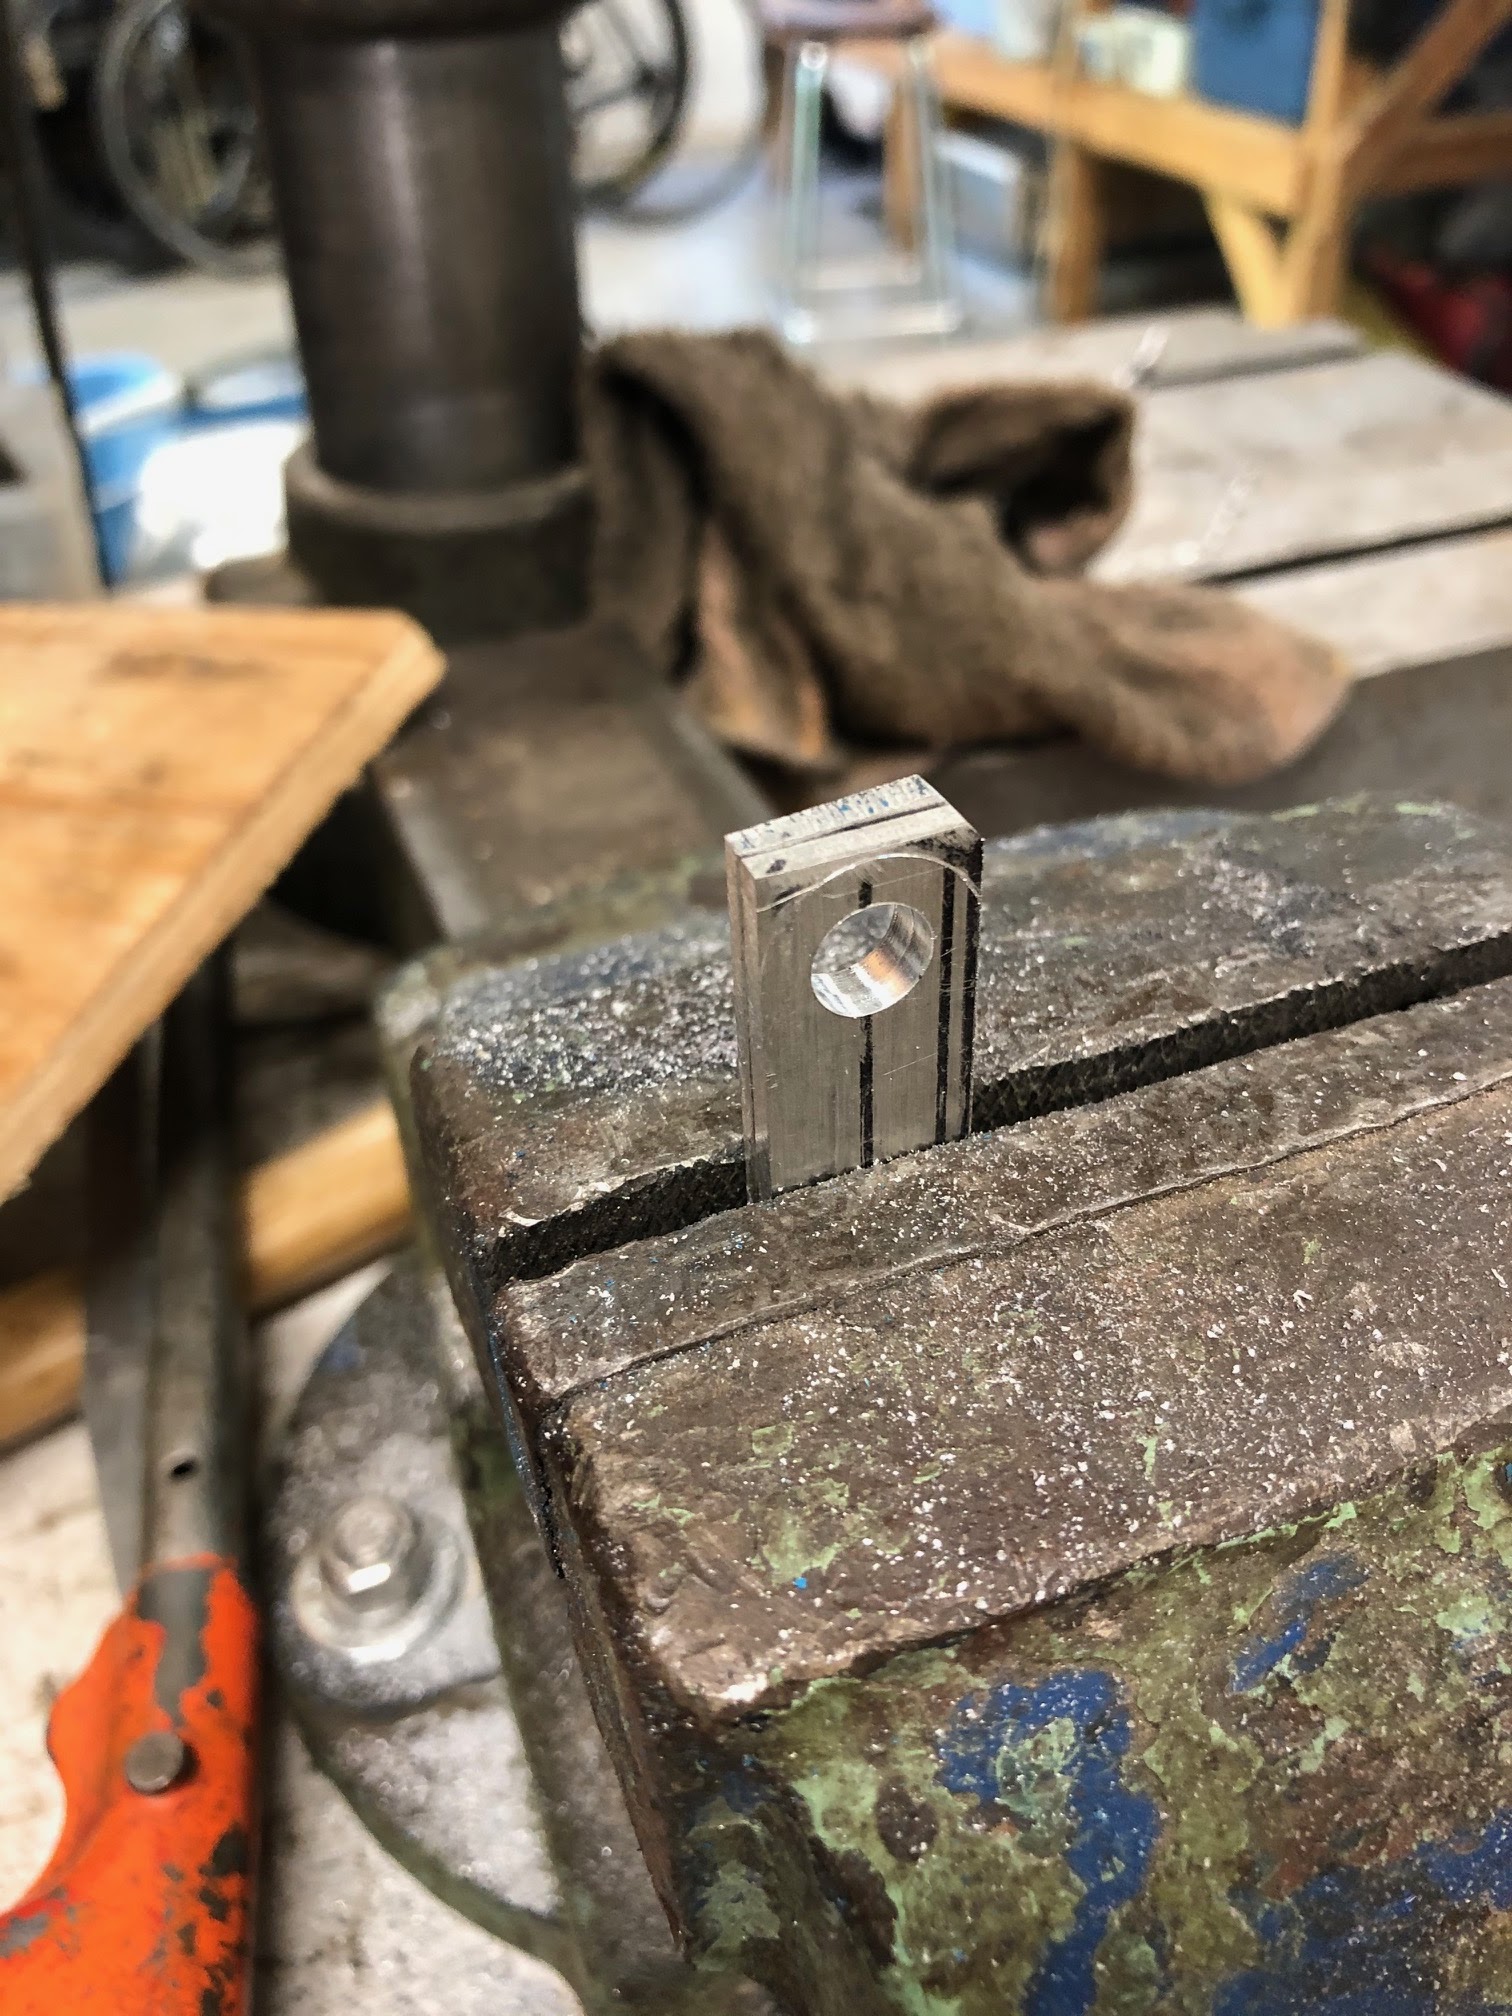
The bolt holes for the foot pegs are on 70mm centres. I figured that one bolt alone (I'm using the original foot peg bolts) should provide plenty of mechanical strength for a 1" nylon baggage strap. But to ensure the strap stays in place, I needed to make a simple bracket from 3mm T6061 scrap aluminum I had lying around. The bracket bridges the two mounting bolts, providing some additional mechanical strength. A few minutes with a hacksaw, file, and drill press had two nice brackets fabricated. I used some aluminum tubing (1/2" dia.) cut to 14mm length as bolt spacers. Total cost about $0 and an hour of effort, since I had the scraps lying around. But if you had to buy the aluminum, tubing, and paint, you're still looking at <$20 with lots of material left over.

The tubing takes the bulk of the load from the webbing loop which pulls up to the rear, in line with the frame tube. Some light sanding, rounding of edges, and coats of Krylon had the end product looking pretty good. 

I though about sliding some plastic tubing over the brackets to provide additional protection for the straps, but this is probably unnecessary. 

Since the Enduristan Blizzard bags are a rackless design, they are meant to press against the rear body panels. While the bags have some nice padding on the inside, I opted to apply some 3M film to the lower section of the paint to protect again inevitable wear from grit. Not the neatest application job, but this was my first time trying a wet application. I'll post the template I used in case you want to cut your own film. 


Next up is fitting the bags. An Adventure Spec top rack is also on its way, which may change my mounting method slightly. Will post on how it all comes together.

Monday, August 3, 2020

Tenere 700: Review at 3800km


Everyone wants to check out my bike and asks me how I like it. I love it. Now that some of the lustre has dulled and it's covered in dirt (as it properly should be) after 3800km of mostly gravel and forest roads, here's my update on how the love affair continues. For reference, I'm coming from a modified WR250R (which I still have) and a 2019 Africa Twin (which I bought new and sold after only two weeks of riding because it just didn't click with me). 

Isn't is top heavy? 
Nope. Even with a full tank, it carries its weight surprisingly well. Cornering and low-speed handling is precise and controlled, even on dirt. There isn't that feeling of "oh sh*t!" when leaning too far; the bike just turns and sticks. Even on dirt at speed, it doesn't have that feeling of running away from you if you hit a corner too hard and risk going into the rhubarb. For comparison, my Africa Twin felt ponderous, like a container ship plowing through heavy seas. The Tenere feels like a speed boat going over the waves. It feels about as top-heavy as my WR250R which is taller and has an aftermarket tank with the volume as the Tenere's. 

Yeah, but my 790 Adventure R / Modified DR650 is way lighter!
So what? There's always going to be some other bike that does something else better or worse, or has better specs on paper. What really matters is how your bike feels for you. Does it let you ride what you want and have fun? The Tenere does that for me: it feels just like my WR250R but with 2.5X more power, which really puts a smile on my face. It has way better traction control because of that smoooooth CP2 engine. My riding skills are absolutely the limiting factor in what the Tenere can do; not the extra weight. Pol Tarrés is proof of that!

How's the suspension?
Now that I've got it mostly sorted out, it's pretty decent. Most reviewers agree that the rear spring is too soft if you're over 65kg (I'm 87kg buck nekkid). I upgraded to an 80N-mm spring from Rally Raid and, with the preload at zero, the rider sag is now -60mm (which will go down to the target -70mm or 30% with my usual gear on, since ridin' nekkid is generally frowned upon). For the forks, I kept the stock springs but installed the Rally Raid preload fork caps with 5mm spacer and three turns of the pre-load adjustment. This gives me -64mm of rider sag (30%). After fiddling with compression and rebound I found a decent compromise between street and dirt. Traction in dirt--even with the stock tires--is surprisingly good even at speed, so I figure the settings are good. However, I'm considering some re-valving this winter to improve high-speed compression/rebound performance. Overall though, the suspension is fine. I'll be loading up the bike with soft luggage soon and then will have a chance to see how it performs under load. 

Isn't the tank too small? Aren't you worried about running out of gas?
Nope. The gas gauge is a little wonky though: It doesn't move for the first 100km, then it drops a bar, then it starts racing towards empty. The Low Fuel light comes on when there's about 1/4 tank (3-4 litres) left! There's a solid 300km range, and probably 350km if you aren't hard on the throttle. I'll carry a 1-gallon RotoPax for longer trips because I don't like to plan more than 300km between fill-ups to allow for the inevitable extra distance from wrong turns, etc. Overall I've been seeing about 3.6-4.6 l/100km fuel economy under spirited riding, and I'm probably averaging about 4.3-4.5l/100km on longer, steady stretches.

How's the wind protection?
I'm just over 6' or 183cm and I wear a peaked helmet (Shoei Hornet). There is almost zero buffeting of the helmet, quite unlike my experience on the Africa Twin. If I duck down about 2", there's a quiet pocket of air and the wind noise is substantially reduced. Anyone shorter than me is going to have a great experience with the wind protection. I don't find the wind noise too bad though; I ride with ear plugs anyways. It's not so loud that I can't enjoy music on my Packtalk Bold headset. Overall I find the protection pretty good and I don't plan to change anything. It's a motorcycle, not a luxury car. 

What would you change?
These are the mods I've made, and all of them have proven worthwhile:
  • Rally Raid fork preload caps
  • Rally Raid shock spring (80 N-mm)
  • Rally Raid stainless steel from hub spacers
  • CamelADV anti-bobble brace for tower
  • Outback Motortek skid plate (essential; the stock guard is pretty flimsy)
  • Outback Motortek lower engine guards
  • B&B Offroad tail tidy
  • Eastern Beaver PC-8 switched power bus
  • Oxford heated grips
  • USB port
  • R&G Racing case covers (protects the water pump and more)
  • Barkbuster Storms
  • Doubletake Mirrors
  • AdventureSpec rear rack (on order; not installed yet)
  • Rally Raid GPS mount
  • Yamaha chain guide (essential)
  • Yamaha radiator guard (essential)
  • Wider pegs (to come)
I didn't mind spending a couple grand on the above farkles because it got me the bike I wanted and all bikes need some customizing anyway. I didn't spring for the adventure seat because I'm waiting to see what Seat Concepts comes up with. The stock seat isn't too bad for me anyway. It's a more compact riding position than on my WR250R, but somehow not as uncomfortable as I initially expected. 

I plan to install a set of Cyclops LED lights because the stock lights, while not bad, don't provide as much coverage as I'd like for our gloomy fall riding.

The stock tires, Pirelli Scorpion STRs, handle very well on gravel and pavement. Kudos to Yamaha for putting on decent rubber. I have a Motoz Tractionator Adventure rear and Shinko 804 front waiting to go on next. 

But don't you miss all the electronics and traction control?
Nope. Had that on the Africa Twin and found it got in the way of just enjoying the ride. I wish the Tenere's ABS off-switch stayed off when the ignition is on but the engine is killed, because that would eliminate a lot of button-pushing during frequent stops. Overall the display works fine. I spend most of my time watching the scenery anyway.

If there's one thing I would change, it's Yamaha's location for the selector switch on the right side. It's almost impossible for me to push it with my right thumb while riding. A thumb switch on the left side would probably work much better. This winter I may see what I can rig in parallel to the OEM switch. 

How is it to service?
Yamaha has put a lot of thought into how this bike is assembled and as a result it's extremely simple to strip down for access to things like the oil filter, air filter, etc. Changing tires is a bit fiddly with the twin front rotor, but entirely doable. By comparison, the Africa Twin was a nightmare in all respects.

The engine is only 72 HP! Every KTM since 1973 is at least twice as powerful!!1!1! 
Yeah, I don't feel like I'm missing out on power except maybe when I'm passing at top highway speed in a headwind going up a steep hill. But that's a tiny percentage of my riding time. Most of the time I'm on rural roads, gravel, dirt, rough terrain. The 72 or however many ponies are more than enough to spin the tire and have a blast. What that number doesn't tell you is how electric-motor-smooth the engine is, and how torquey it is at low RPMs. You can crawl along in 2nd or 3rd, give it some gas, and spin up to speed in no time. The engine is a beautiful work of tractable power. Easy to ride all day long at any speed, standing or sitting. 

Does it need bar risers?
No. At 6' tall, I find the riding position nicely balanced in stock form. I did rotate the bars forward a touch though. 

Conclusions
If you like the WR250R, you'll probably love the Tenere 700. It's just a big WRR, with all the power that the little 250 could never deliver, and at only a small perceptible weight penalty. If you prefer the edgy, full-concentration, high-strung power and handling of a KTM, you'd probably find the Tenere to be a little boring perhaps. If you're riding an 800GS or similar BMW, you'd probably find the Tenere to be just as much bike but slimmer and lighter-feeling in your hands.

This summer I'm doing a longer tour with luggage, and we'll see how the Tenere performs under load. 

Thursday, June 25, 2020

Tenere 700: Outback Motortek engine guards and skidplate

Oh boy, did I ever agonize over what skid plate and crash bars to choose! On the one hand were excellent options based on engineering requirements: these included guards and skid plate from Adventure Spec, the plastic skid plate from AXP Racing, and even the Yamaha OEM guards and skid plate. On the other hand, COVID's interference with supply chains made some options unavailable within a reasonable timeframe. Since I didn't want to get stuck with nothing for when my bike arrived in early June, my options converged to the lower crash bars and skid plate from Outback Motortek. They appeared to be in stock and I'd been satisfied with the versions I'd installed on my Africa Twin. 

Evidently, every other proud new owner of a Tenere in Canada had the same idea. My "in stock" items were actually sold out at the Canadian distributor and so I ended up waiting more than a month for delivery after placing my order. Now that I've finally sorted out the installation, here are my observations and recommendations in case you're considering the same parts. 


First, Outback Motortek is widely recognized as having good stuff. Their materials, design, fit, and engineering all seem pretty solid and the company takes pains to test the practical effectiveness of their products. So, no real concerns about the engineering. I didn't opt for the full (upper) crash bars because of the weight they posed up high, and I figure that the combination of lower engine guards with pannier rack and panniers will provide adequate protection for low-speed tumbles. (R&G engine case covers are also on order to protect the vulnerable water pump.)

The high molecular weight tape inside the frame clamps is a nice touch to protect your bike. However, the clamp was more than snug on the frame, and tightening the bolts proved tricky. 


Some customers have reported poor finishing on some of Outback Motortek's parts lately (e.g. weld spatter and uneven fill) as well as some fitment being a nuisance. Both my left and right guards showed some of these minor problems, but they were easily resolved. 

The hardware included in my kit did have one significant shortcoming. Each guard uses an M12 bolt inserted through a 15mm high collar to mount the midpoint of the guard to the engine case through a frame member. The right-side bolt is 50mm long; the left side about 35mm. Since they thread into a major load point, you need a solid connection. However, the longer of the two M12 bolts provided in my kit was only about 55mm long--too short to provide more than about 6mm of thread inserted into the engine case. There's no way I'd compromise the connection strength at this location with such little thread insertion, where at least 20mm is required as per the OEM bolt. 

The following pic shows the OEM M12 engine bolt for the right side (black; 50mm long) compared with the longer of the two bolts provided in the kit (55mm; silver, in the middle). On the right side is a 65mm bolt which I ordered to ensure sufficient thread insertion. The specification of the 65mm bolt is:

M12-1.25 x 65mm, DIN960 Class10.9 Zinc (note the thread spacing of 1.25mm; 1.50 mm is more common in M12). Fastenal.ca carries this as part #11114018, cost of $2.00. The 65mm bolt has a 19mm hex head vs. 17mm for all the other bolts; I couldn't find a 17mm version. 


Here's the right side OEM bolt compared to the new 65mm bolt in the same position. The photo distorts the length difference; they're actually very close. 


For the left side engine guard, you can re-use the 50mm OEM bolt from the right side since it gives exactly the extra 15mm you need to ensure sufficient threading (and is the same length as the longer of the two kit bolts I received). Here's the 50mm bolt from the kit mounted in the collar and compared with the OEM left side bolt. Don't forget to use a washer when installing either of the 50mm bolts on the left side. 


The inside of the collar had a rough weld that needed a bit of filing so the bolt would sit flush.


The easiest way to install the guards is to first remove the two front body panels on each side of the bike (i.e. the panel with the turn signal attached and the small vented panel next to it). This provides access to properly align, hand-thread, and then torque the engine bolts to 75 N-m. I was not able to fit a socket onto the left side engine bolt because the guard was in the way (a minor design flaw). The two M6 hex bolts for the upper guard attachment point should be torqued to 30 N-m. Note that Yamaha thoughtfully made the OEM bolts long enough to accept the guard and ensure complete threading. Here are the OEM bolts (black) compared with the kit bolts. The OEM bolts on the left side have little rubber sleeves over the extra exposed thread on the inside. 


I found it easiest to install the engine bolt first, then the two M6 hex bolts at the top, then the lower cross-bar bolts, then the lower frame bolts for the U-bracket. 

The finished assembly seems to be sturdy. 


If I was choosing engine guards again, I'd probably opt for the Yamaha guards since they seem to have held up well for Nick Sanders and the two KAP2CAP riders. Plus they give the option to mount small bags, which is appealing. However, for my modest needs, the lower guards should do just fine.

As for the skid plate, it's a no-brainer to install and is a serious upgrade from the flimsy stock guard. I added a patch of 3M sound deadening material to the inside bottom on the left side (away from the exhaust pipe) to help reduce ringing vibrations. This seems to work, based on a highly scientific finger-flick test. 


The Outback Motortek guard uses much thicker material.