The lure of a multi-day adventure ride becomes irresistible
for many dual-sport riders. Last year’s Roaming Rally 2015 was my first real
opportunity to put family and work obligations on hold and explore routes
beyond the horizon of my usual day-long sorties from home.
The rally also proved to be a serious test of my riding
skills. The speed and agility of my two much more experienced teammates—besides
schooling me in proper technique—pushed me to my limits in being able to keep
up. There was no time for pictures! Route-finding, technical challenges, and daily
distance necessitated a hectic, exhausting pace to complete both days of the
rally. On reflection I was amazed that both my WRR and I survived with only a
little wear. But the hook was set.
This year my goal was to repeat the Rally’s thrills of
discovery and self-reliance, but at a slower pace that would allow me to savour
the experience and, yes, take pictures. As a starting point for choosing a
route, the
Trans-Canada Adventure Trail (TCAT) has always intrigued me. It also
conveniently passes through my town of Almonte just west of Ottawa, and formed
part of the
Roaming Rally 2015. Jumping onto the TCAT would save some effort in
plotting a route and initially I considered following it east up into Quebec.
But this would likely take longer than the three days I had available to me.
Heading west on the TCAT, under Algonquin Park and up towards North Bay, seemed
more achievable, and that led to the idea of circumnavigating the park.

The
“Round Algonquin Park” (RAP) concept has its roots in a
classic snowmobiling ride that’s a well-known winter attraction. Borrowing
heavily from the sled route, dual-sporters have come up with various options
that can be ridden in summer. I stitched together some ideas using Garmin
BaseCamp and Google Maps to come up with a route that I hoped could be
completed in three days starting from Almonte. About three quarters of the
trails were unknown to me, although I was generally familiar with the region
south of Algonquin Park. West and north of the park would be pure discovery for
me. There were lingering questions about whether many sections were passable.
I’d just have to ride them to find out.
My original plan was to have one or two other riders join
me, but unavoidable changes in my vacation schedule meant the other guys
couldn’t make it. So I ended up riding the full 1300km solo over three days.
Each day entailed about 12 hours of riding in one of the hottest summers we’ve
had on record, with humidex pushing temps into the low 40’s. The terrain was a
challenging mix of rocky Canadian Shield, powdery sand, and loose gravel forest
access roads, with a total 17,000m of elevation gain/loss. Several sections of
slab to connect trails initially seemed undesirable, but I grew to welcome them
as a break from all the off-road pounding.
As a safety consideration I left copies of my planned GPX
route with various family members and vowed to check in regularly, e.g. at fuel
stops. However, several sections were either unrideable (e.g. closed) or I
simply missed a turn thanks to some GPS routing issues that I
described in an earlier post. In any case, if you trim off the obvious back-tracking and
dithering, the actual route I took proved to be a great option for
dirt-oriented bikes under 650cc, and is probably closer to 1150 km. This is not
a route for larger adventure bikes and full-knobbies are essential. While trail
conditions were almost entirely powder-dry along the entire route (except for
torrential downpours over the last four hours), it was clear that in wet
weather there would be many sections with shallow water crossings and extended
riding in mud.
Fuel stops abound along the way and the longest run I had
was about 135 km when my low fuel light (stock 7.2L tank) came on as I arrived
at Bancroft. I carried an extra 4 litres of fuel (100km) in a RotoPax and I
never dipped into it, instead topping up my tank at every opportunity.
It’s also important to note that you can’t rely entirely on
Google Maps or Garmin’s
Backroad GPS Maps to identify a passable route. I found
several cases where trails shown as major routes in the maps did not exist,
were overgrown or otherwise impassable, or not shown on the maps at all but
were clearly the main route. The final route I took was well travelled and
should be reliable other than where wet conditions may create new challenges.
The route is published here as a Garmin Adventure, but I've found this service to be a little flaky and it doesn't always seem to do what you tell it. Hopefully the GPX is downloadable.
Day 1: Almonte to Huntsville
My route aims further south than the TCAT for much of the
day, to connect with the positively-reviewed Pencil Lake trail about mid-way.
Leaving on a Wednesday, I expected to see more traffic but the roads were zombie-apocalype
deserted. It’s great having paved roads all to myself, because the gearing I’ve
put on my WRR makes exceeding 90 km/hr a real buzz-fest and I don’t like being
“that guy” holding up traffic. But the lack of traffic also heightened the
sense of remoteness. Be prepared for a long walk to help if something goes
wrong.
Almonte-Hopetown
Mix of quiet rural paved and gravel roads through rolling
terrain. Gas station in Hopetown had a classic scene of old-timers in work
clothes drinking coffee and chatting around a beat up table. Last chance for
gas until Ompah.
Hopetown-Ompah
Bush roads and gravel roads give way to pavement along the
509. Don’t despair at the pavement—you’ll follow it for a while longer and at
least it’s pretty.
There was a nifty old stone-crusher near Snow Road Station.
Ompah-Ferguson Corners
I had plotted an off-road route from just south of Buckshot
Lake to Ferguson Corners, but didn’t find the entrance where the maps suggested
it would be and ended up continuing on the paved road rather than lose more
time. It’s too bad, because I’ve mountain biked through this area before and
know there are some good bush trails. Will need to investigate again and
confirm a good route.
Ferguson Corners-Bancroft
This is a long section of remote bush roads that’s more
technical than anything so far, and a lot of fun to ride. Knobbies highly
recommended. This was one area where Google and Backroad Maps don’t align well
with reality, but if you follow my track you’ll be fine. Terrain is sandy in
places with exposed rock and lots of washouts on climbs/descents. You can get a
truck into all of it should rescue be needed.
On Hartsmere Rd. you need to turn left onto Missippi Rd,
which isn’t marked as such and is signed instead as a Forest Access Road
immediately after you cross a bridge. It’s easy to miss this turn because the
Forest road doesn’t look like much and appears to end in the swamp. However, it
turns into a great ride all the way to Quirks Rd. Quirks was posted as hosting
a rally road race. Not sure what kind of cars would handle it—it was pretty
rough and narrow.
Bancroft-Minden
The TCAT follows 28 out of Bancroft, but I followed a scenic
route on a mostly gravel road north of the 28 which was worth the detour and
avoids some slab. Then it’s slab again before you hit a long section of dirt at
Eels Lake Rd., which leads into the Pencil Lake route. This was the most
technical section of the entire RAP and, combine with its remoteness, probably
poses the most risk. Pencil Lake follows a snowmobile trail that sees heavy
year-round use. It’s well worn with many washouts, sections of exposed rock,
and mud areas which mercifully were dry when I passed through. It would be a
real grind in the wet.


One notable swamp (remarkable because it appeared deep when
everything else had dried up) has a bypass route off on the North side that is
technically challenging. Here I ran into the first ATVers I’d seen all day, who
were slowly picking their way up the steep, rooty and rocky pitch. You have to
gun it and go on a motorbike. Fortunately I was able to wiggle through without
hitting anything or coming off.
This whole section was probably the roughest of the entire
RAP and the one least suited to large DS bikes. If you bypassed it, you could
probably do the rest of my route on a larger bike, if you took your time.
My intended route aimed north from White Lake but somehow I
missed the turn and popped out on the 503 further south. Just north was a nice
picnic stop at Furnace Falls, where several people were enjoying a swim. The
Old Irondale Rd. sent me back into the bush before a straightforward finish
into Minden.
Minden-Huntsville
Shortly after leaving Minden is an unavoidable long and
boring section of slab on the 118. Watch for the sneaky turnoff onto Black
River Rd. This winds north and eventually reconnects with Old Wagon Rd. near
Goodman Lake, but the map doesn’t show these roads connecting. In fact, it’s an
area with a lot of active logging and there are many new roads not shown on the
maps. I got lucky and connected with Old Wagon Rd. no problem. Old Wagon itself
is a rough, dark and rugged track that must’ve frustrated many a pioneer. Could
be interesting to take it right from where it starts at Black River Rd. to the
south.
Baysville has some good eats at Miss Nelle’s café, just
around the corner from the Lake of Bays Brewing Company, which has great craft
beer. Lots of money in this town. The teen at the gas station had a WRX and we
admired each other’s bikes.
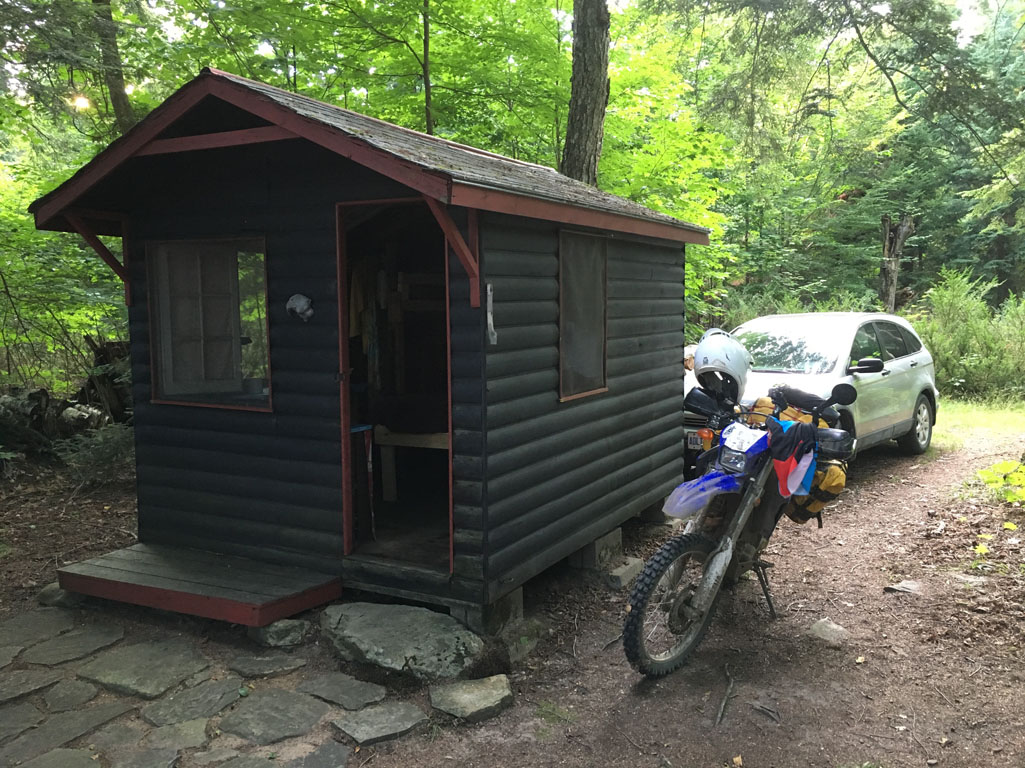
It was a no-brainer from Baysville to where I stayed at our family’s rustic cabin on Lake Solitaire (no public access) but there are many other camping/motel options in the area.
That night I made the mistake of turning off my iPhone. I
couldn’t remember the passcode (which I’m required to change often and without
warning), which unfortunately meant that I couldn’t take pictures for the next
two days of the trip. Looks like I’ll have to repeat the route with a real
camera!
Day 2: Hunstville to Mattawa
Huntsville-Seguin Falls
I followed the TCAT closely for the next few hours. However,
since I’d bypassed Huntsville, I had to make a short detour to Novar just north
of Arrowhead Provincial Park on Hwy 11 to gas up my bike and my body. There’s a
depressing little grocery store/gas pump where beef jerky, granola bars, and
bottled water were the best options.
From here to Mattawa the RAP passes through predominately
sandy soils peppered with large rounded rocks left by the glaciers. In dry
conditions you’re riding in fine powder, and you really have to be on the ball
to not wipe out or whack a half-buried boulder. For instance, just before Novar
you follow a lumpy ATV trail that traverses some ledgy rock outcroppings and
lots of sandy washouts. I missed a shift going up a climb, stalled out, and
dropped my bike on the right side as it slid backwards, bending the foot peg.
There’s a fine balance between givin-er to get up something, and not cratering
your loaded bike on a sharp ledge that could puncture your tire or bend your
rim. This section, although short and easily bypassed, would’ve been challenging
on a heavier bike.
Sprucedale-Magnetawan
Initially the TCAT follows an old rail bed now called the
Seguin Trail. A permit is required to ride this trail. Since it mostly
parallels the main road (518) and consisted of endless sandy whoops, I opted to
stick with the road, which also allowed me to enjoy the scenery a little more.
This whole area embraces beautiful pine and spruce forests and
a fascinating history. By around 1850, pioneers had pretty much filled up the
prime lands granted in southern Ontario and the Crown was looking for new areas
to populate with immigrant waves of Scots, Brits, Irish, and United Empire
Loyalists from the United States. Several government settlement roads were
pushed north into what was called the Ottawa-Huron tract between Lake Huron and
Ottawa, one of which was the Nippissing Road. Despite remarkable efforts to
build towns in the wilderness, the land was poor for agriculture and it could
not sustain the vision. The opening of the prairies to settlement by around
1875, combined with the advent of railways to facilitate the extraction of
timber in the region, sealed the demise of the fledgling communities. Today
little remains but ghost towns and abandoned railbeds.
Following the Nipissing Road was one of the high points of the
tour, and it’s a section I’d like to repeat with my copy of Ron Brown’s “Ghost
Towns of Ontario” to gather more perspective on the sights.
In Magnetwan, your only option for premium gas is the marina
on a side road south of the bridge coming into town. There’s regular gas only
available a few kilometers north of town at the intersection of 520 and 124.
Magnetawan-South River
The section of the Nipissing Rd. north of Magnetawan is a
rough track, probably more faithful to the condition of the original road. It’s
well worth the trip.
Eagle Lake is a classic northern Ontario beauty with golden
sand beaches and pine forests. There’s a little general store with gas and
burgers just across the spit that bisects the middle of the lake. It’s also a
good place for a swim.
South River-Powassan
My original route bypassed Trout Creek and aimed north on
what my maps showed to be Genessee Lake Road. However, at the turnoff indicated
on my GPS, there was no obvious road. It’s likely the indicated road was an
old, disused forest road that has since become overgrown. Several other
promising forest roads headed north in the vicinity, but I was concerned about
time and didn’t explore. This was unfortunately, but soon I found myself in
Trout Creek facing several kilometers of stressful riding on the four-lane Hwy
11 to reach Powassan. There has to be a better option though some of those
forest roads.
Powassan-Mattawa
Although the track east of Powassan is straight, the route
is quite scenic and rolling, following agricultural backroads with the forested
highlands looming close to the south. This is pretty much the most southerly route
east before you enter those highlands, and it’s easy riding for any bike.
Optimistically, I attempted to follow the winter RAP route
where it cross the Amable du Fond River just north of the eponymous provincial
park. You can see diversion clearly on the track. Initially it follows a wide
gravel road through sandy terrain, that soon becomes a rough road where active
logging was being carried out. It was somewhat reassuring knowing there was
potential help nearby, although I had to be careful watching for logging trucks
and giant War-of-the-Worlds-like tree-cutting machines. The logging road soon
devolved into a grassy trail that clearly didn’t see much (if any) summer use
by ATVs. That’s usually a sign it isn’t passable and I’d already plotted a
bypass, but I wanted to check it out. At one point the trail descended a steep
slope down to the river. Recent rain had washed it out heavily, and the deep
ruts were filled with soupy quicksand. It was the worst section of trail I’d
seen yet. Of course, foolishly I decided to head down it.
After basically sliding down about 100m, I accepted this was
a dumb plan and resisted my curiosity to go just a little bit further and
hopefully see the river. Good thing, because I had stopped at a somewhat level
area where I could make a 10-point turn to face back uphill and have a run at
the quicksand. Next came one of my proudest moments, where I gunned it in first
gear and roosted my way all the way to the top like a total motocross stud,
jumping 2-foot deep ruts, plowing through the soup, and narrowly avoiding trees
on either side while keeping balanced on a fully-loaded bike. It would not have
been possible without full knobbies and it could’ve ended so badly!
Safely at the top, there was no question of looking for
another way over. I retraced my steps to go around this whole section, a
significant detour that was also a whole lot safer.
Another dead end proved to be my original plan to take
Bronson Lake Road south. This ends at a gravel track with a sign stating the
route’s closed, although there was some indication of ATV use. It had been a
shot in the dark anyway, so again I retraced my steps and followed Homestead
Road.
By this point I’d noticed that the Backroad Maps loaded on
my GPS showed an “Algonquin Dual-Sport Route”. It’s kind of hidden behind other
map data, so you can’t really see the route unless you scroll and notice the
colour appear when the screen redraws. I was now torn between following this
recommended route, and sticking with my made-up route which happened to
coincide with the programmed route. What happened next in Mattawa sealed my
decision.
Given the heat and my fatigue after 12 hours on the pegs
that day, I’d decided to look for a room at the Valois motel in Mattawa rather
than camp as planned. Arriving in Mattawa, there was a short section of trail
that crossed the tracks and came out at the motel. I took the shortcut but
after descending the rocky, washed out trail, the end was blocked by a parked
train. After turning around I managed to drop my bike on the right side when I
stalled trying to get started up the steep washout. No problem, pick up the
bike and start again. However, when I put down my left foot to balance, it met
nothing but air. Hidden in the raspberry bushes to my side was a 5-foot deep
ditch full of washed out boulders and sand. I tipped over right into the ditch,
landing upside down with the bike falling on top of me, wedging me in the
bottom. Here I was, just a stone’s throw from my hotel, watching fuel leak out
onto me from my bike which was completely inverted.
I managed to wiggle out from under my bike, thanks to my
soft side bags which made a little space. Amazingly I didn’t seem to be injured
other than a banged thumb and left thigh (ATGATT FTW!). However, the trail was
now up around neck height and I had no idea how I was going to get my bike out.
I trudged back up the trail to where some houses were, but didn’t see anyone
around. Then I saw a kid who was out on his mountain bike had discovered my
bike. He offered to help. After unloading as much gear as I could reach and fishing
out a rope that I tied to the front wheel, he was able to hold the front wheel
enough to prevent it from slipping back while I bench-pressed my bike out of
the ditch.
By this point I was completely heat-exhausted (temps were in
the high 30’s) and the motel was mandatory. No damage to the bike except a
small scratch in the mirror and a scuff on the turn signal. After letting it
sit upright for a while, it fired right up and I head to the motel. A cold
shower, beer, and schnitzel never felt so good!
Day 3: Mattawa to Almonte
Mattawa-Deep River
After yesterday’s excitement I was feeling a little stiff and
slightly more risk-averse. Rather than follow my original planned route, I
decided to follow the Algonquin Dual-Sport route indicated in my GPS. This
proved to be a great decision, as it took a spectacular route along forest
roads that allowed me to enjoy the ride without having to worry so much about
the route. This section is highly recommended.
My original route had a longer section of dirt rather than
bail out at Hwy 17, but I needed a break from the dirt and opted for some slab
and having to pull over every so often to allow cars to pass.
A detour south onto Moore Lake Road was interesting. This is
another place where the maps don’t match reality. My track follows a
well-travelled route used for the winter RAP and ATVs, that doesn’t show on the
map. There’s probably a way to connect this further to avoid hitting slab
again, but I didn’t feel confident getting too far off the path in this area
while riding solo. Somewhere along here a bear ran across the trail in front of
me. There was lots of evidence of bears on this trip!
Deep River-Petawawa
There do not appear to be any feasible dirt routes through
this area, so I stuck with the highway, which the Algonquin Dual-Sport Route
also indicated.
Petawawa-Killaloe
The military exclusion zone around Petawawa precludes bush
routes that otherwise seem viable from just looking at the map. You’re pretty
much restricted to the track I took, which follows the Algonquin Dual-Sport
Route and is actually quite nice.
I deviated from the Algonquin route along Round Lake Road,
heading south along some great ATV/snowmobile trails that I hoped would connect
me to Golden Lake. This is another case of reality not matching maps, and I had
to do a little retracing to find a route. However, the track I ended up taking
(minus the deviations) is an excellent route and could be ridden by larger
bikes with knobby tires, although probably not too fast.
Killaloe-Almonte
The threatening storms finally caught up with my when
leaving Killaloe, and I spent the rest of the ride in hail, torrential
downpour, and mud. It was a blast though.
The section from Killaloe to Griffith followed the Roaming
Rally 2015 route and is highly recommended for all bikes. It entails many steep
hills, some with great views of the surrounding countryside. The trails are in
excellent condition, appearing to have been recently rebuilt. Despite the rain,
the section from Kargus in particular was pure dual-sport riding joy. By the
time I arrived in Griffith for a gas stop I was thoroughly soaked and
squelching in my boots like some road-warrior reject, but at least I was
riding. A bunch of Harley riders had parked across the road and were waiting out
the rain in their muscle shirts, jeans, and beanie helmets.
From Griffith there’s a great trail through the bush that comes
out on Morrow Road. I’ve taken it many times, but this time I was just aiming
to get home by the fastest way possible. Thanks to my phone being bricked, I’d
been out of touch with family for two days and they would start to worry if I
didn’t make it back by dark.
The little WRR proved to be a tank and well-suited to the
adventure. Along the way I got many surprised reactions from people when they
learned I was riding around the park on such a small bike. It would’ve been
nice to have a little more power and speed for some sections (especially on the
highways), but it certainly wasn’t a deal-breaker. Likewise for fuel capacity.
At each fuel stop I needed a break anyway. My tires, an MT21 on the front and
D606 on the rear, were perfect and seemed to have held up much better than the
Scorpion Pro FIM and K760 I rode on the Roaming Rally.
My only regret is not being able to take pictures on days 2
and 3. Next time!
Update September 21, 2017
Here's the
next time, with more pictures and double the distance.
GPX files and other goodies can be found
here.