Finding the perfect compromise between crash protection for off-road riding and all-weather protection for multi-day adventures has, not surprisingly, proven elusive. Over the years I've experimented with various jacket/pant systems, starting at the low end for price and durability, becoming dissatisfied with comfort and performance, and eventually working my way up to the set of gear I'm using currently.

In my part of the world (Ottawa, Canada), the riding season is woefully short--barely stretching from late March (or whenever the rain has rinsed most of the road salt away) to mid October. July and August can be mercilessly hot and humid, with temperatures in the upper 30's Celcius with the humidex (worse in the bush!). Mesh gear is essential to avoid heat exhaustion in these conditions, but the frequent risk of violent summer storms with corresponding temperature drops means carrying some heavy-duty rain protection on longer trips. And that creates the problem of having to frequently stop and change gear to stay reasonably comfortable.
As a result, I've converged on
two sets of gear: one set based on the
2018 Klim Carlsbad jacket and pants for everything but peak summer, and the other based on the
Klim Mojave pants with TekVest, and Klim Tactical jersey for the hottest days. With both sets I wore Alpinestars Fluid Carbon knee braces and Fox Titan elbow pads, having removed all the armour in the Carlsbad suit.
Both sets got a full workout during a month of riding the Continental Divide this past summer, so now I can report on how well things worked. Conditions ranged from low single-digit temperatures at mountain elevations of up to 4,000m, to parched sandy deserts well into the 40's. One big difference from conditions at home was the low humidity: while it was easy to get hot and sweaty, it was equally easy to dry out rapidly because of the arid conditions. At home, my riding gear remains a soggy mass of sweat no matter how little you wear or how fast you ride.
In the next sections I'll cover some observations of how the components worked together (or didn't).
Alpinestars Fluid Carbon knee braces
The D30 knee armour that comes with the Carlsbad pant is basically a joke because it flops around and offers no realistic protection in the event of a crash. Having previously tweaked a knee while riding, I wanted more support and protection on a long trip to remote areas. The Fluid braces seemed to offer good value and comfort compared to other off-the-shelf options I considered. They also happen to fit my physique almost perfectly and they articulate well with knee movement, generally remaining in the correct position after many hours of sitting and standing on the pegs. Putting them on, adjusting, and removing them is easy.

The L/XL braces fit under my size 34 Carlsbad pants with acceptable room, such that the pant fabric can still slide around freely. Nevertheless, the combination does stiffen the limbs, making swinging a leg over my WR250R somewhat prone to whacking the seat. Although I'm reasonably flexible, the issue is really the lack of stretch in the Carlsbad fabric combined with the brace simply doing its job of restricting knee movement. Once on the bike, the combination felt fine, although over time the brace would slip down slightly and cause the top part to push out from the thigh, creating a tight spot in the leg fabric. Regular contact with this area would likely accelerate fabric and stitching wear, although I didn't notice a problem.
Something else to consider with your gear is how easy it is to partially drop so you can sit on a toilet. The last thing you want to do when making a pit stop in some dilapidated gas station or restaurant loo is get all undressed on a urine-soaked floor. The combination of Carlsbad pant, knee braces, and adventure boots requires a complicated set of yoga moves to do your business. You quickly learn to bask in the power of coffee first thing in the morning, before getting dressed to ride.
My verdict on the Carlsbad/Fluid combo is I would hesitate to recommend it unless you have slimmer legs. I actually avoided wearing my Carlsbad pants as much as possible because conditions were simply too warm and ventilation and movement was too limited. I probably only wore the pants 4-5 days in a month of riding, vastly preferring the Mojave pants unless it was actually raining.
Under the Klim Mojave pants the knee braces worked almost flawlessly. These pants offer a slightly more generous cut than the Carlsbad and correspondingly much more comfort. Klim should apply the Mojave fit to the Carlsbad line, as the intended use profile is similar except for wetness of conditions. With this combo, I could easily forget I was wearing the Fluids even after 10-12 hour days.
In dual sport riding (or at least, the way we rode), there seems to be a constant need to kneel on the ground and fuss with the bike. The Fluid offered reasonable kneecap protection in these scenarios, but I noticed that sometimes small rocks could press through gaps in the patella cover. Not a good sign for an accident scenario.
After three weeks of wearing the Fluids, I was dismayed to see that the padding on my left leg side had become detached from the carbon structure. It looks like heat and sweat had deteriorated the adhesive, allowing the padding to migrate under flexing.
I was annoyed to see that some of the knee padding had migrated through to the front, leaving unprotected holes. A different shape for the padding may solve the latter issue. Adding some Gorilla tape failed to solve these issues. In a product as costly as this, I would expect to get more than 20 wearings out of them before experiencing issues like this. Fortunately, the store where I bought the braces showed them to the Alpinestars rep and agreed to cover them under warranty without issue. So, a new pair is on its way and I'll probably reserve them exclusively for more aggressive trail-oriented day rides rather than multiway adventures.
Carlsbad pant
It's worth a few additional comments about the pants independent of the knee braces. The Velcro waist adjustments proved very effective and comfortable to accommodate layering tops/bottoms, and to compensate for the 15lbs I lost in a month of riding. I ended up achieving optimal weight for the pants to ensure their fit and flexibility without flapping fabric. In addition, the leg snaps for the boot area proved superior to Velcro (as on the Mojave pant) for adjusting fit around the boots.
My two minor gripes with the Carlsbad pants are, first, the crotch area is not very flexible, and it must be positioned a precise way to avoid painfully wrenching certain more (ahem) stretchy parts of anatomy in that region. Klim could use some work with the cut of the fabric in this area, even substituting a 4-way flex material for GoreTex as a reasonable tradeoff for breathability.
The second nit--and somewhat tied to the first--is the tendency for the pants to slip down. Again, this seems to be mainly a consequence of using non-stretchy fabric with a slippery interior, exacerbated by knee braces. I ended up ordering suspenders and they help keep the pants (and crotch) in the right position.
Otherwise, the pants are brilliantly waterproof and ideal for cooler conditions. My riding partners wore their Carlsbad and Badlands suits the entire trip--but I found the gear to be intolerably hot and exhausting in the heat we experienced.
TekVest RallyMax
I ended up wearing the vest over either my Carlsbad jacket or Klim Tactical jersey, combo chosen depending on the day's temperature. After a few weeks the vest had moulded perfectly to my torso and was supremely comfortable. It offered both excellent protection and airflow, and I came to feel naked when not wearing it. This piece of gear is a keeper.
For our Rockies trip we each wore a Kriega 30 litre pack loaded with essentials (hydration, camera, ID, snacks, etc.) carried at all times. Next time, I wouldn't choose to wear a pack and would instead strap it to my bike as one our riding trio ended up doing. While my pack fit over the RallyMax just fine, the vest has its own pouch to carry a hydration pack comfortably, obviating the need for a separate carrier. Getting the additional weight of a pack off my back would significantly reduce fatigue on long days.
On hot days, the vest and jersey made a terrific swamp cooler when both garments were soaked with water. My verdict is that vest, combined with the Mojave pant and jersey, was a fantastic setup I could live in comfortably for day after day of good weather.
Klim Tactical Jersey
The jersey served me well, proving durable, comfortable, and easy to maintain by dunking it in mountain streams to rinse out the dust and renew its swamp cooling capacity. However--and something I hadn't thought to anticipate--wearing all this mesh gear allowed dust to penetrate to my core and mix with sweat, resulting in a funky mix tempered only by rapid evaporation. Always a tradeoff.
If there was a nit with the jersey, it was its interaction with my Fox Titan elbow pads. I'd opted to use separate pads instead of the Carlsbad jacket's built-in elbow armour, since I wasn't planning to wear the jacket except when raining. However, I found the jersey caused the elbow pads to migrate down my arms, ending in a position that offered only partial protection.
Otherwise, my verdict on the jersey was a solid A. Now, if only Klim would offer it in some bright colors.
New armour - EVS Travis Pastrana TP199
Having concluded that the Fluid braces are probably overkill for 80% of my riding, I started looking for a more comfortable alternative to wear under the Carlsbad pants that wouldn't also require wearing tights to avoid chafing, as happens with the Fluids.
The EVS TP199 knee armour may be just the thing. It's a brilliant combination of soft and D30-like armour stitched into a tube-within-tube configuration.
The design, which incorporates a hole in the inner sock for your patella and a breathable mesh behind the knee, ensures the assembly remains in the correct position while allowing the CE Level 1 armour to flex around your knee and providing decent lateral support. It's very comfortable and fits nicely under the Carlsbad pant. While I haven't had a chance to ride with these pads on yet, it's easy to forget they're on. My only concern is lower breathability than the braces, but this may be offset by not having to wear tights to avoid chafing.
The sides of the knee are well covered and when kneeling, the kneecap seems to offer more protection than the Fluid braces. While there are only two sturdy straps to secure the armour in place (compared with four on the Fluid), they don't chafe and prevent the armour from sliding down. The shin protection is rigid and provides further stability when tucked into the boot.
Overall very encouraging. I wouldn't hesitate to ride with this on my next long trip. Sizing information below. I chose L/XL, which fits me well (6', 185 lbs).
New armour - Alpinestars Sequence jacket
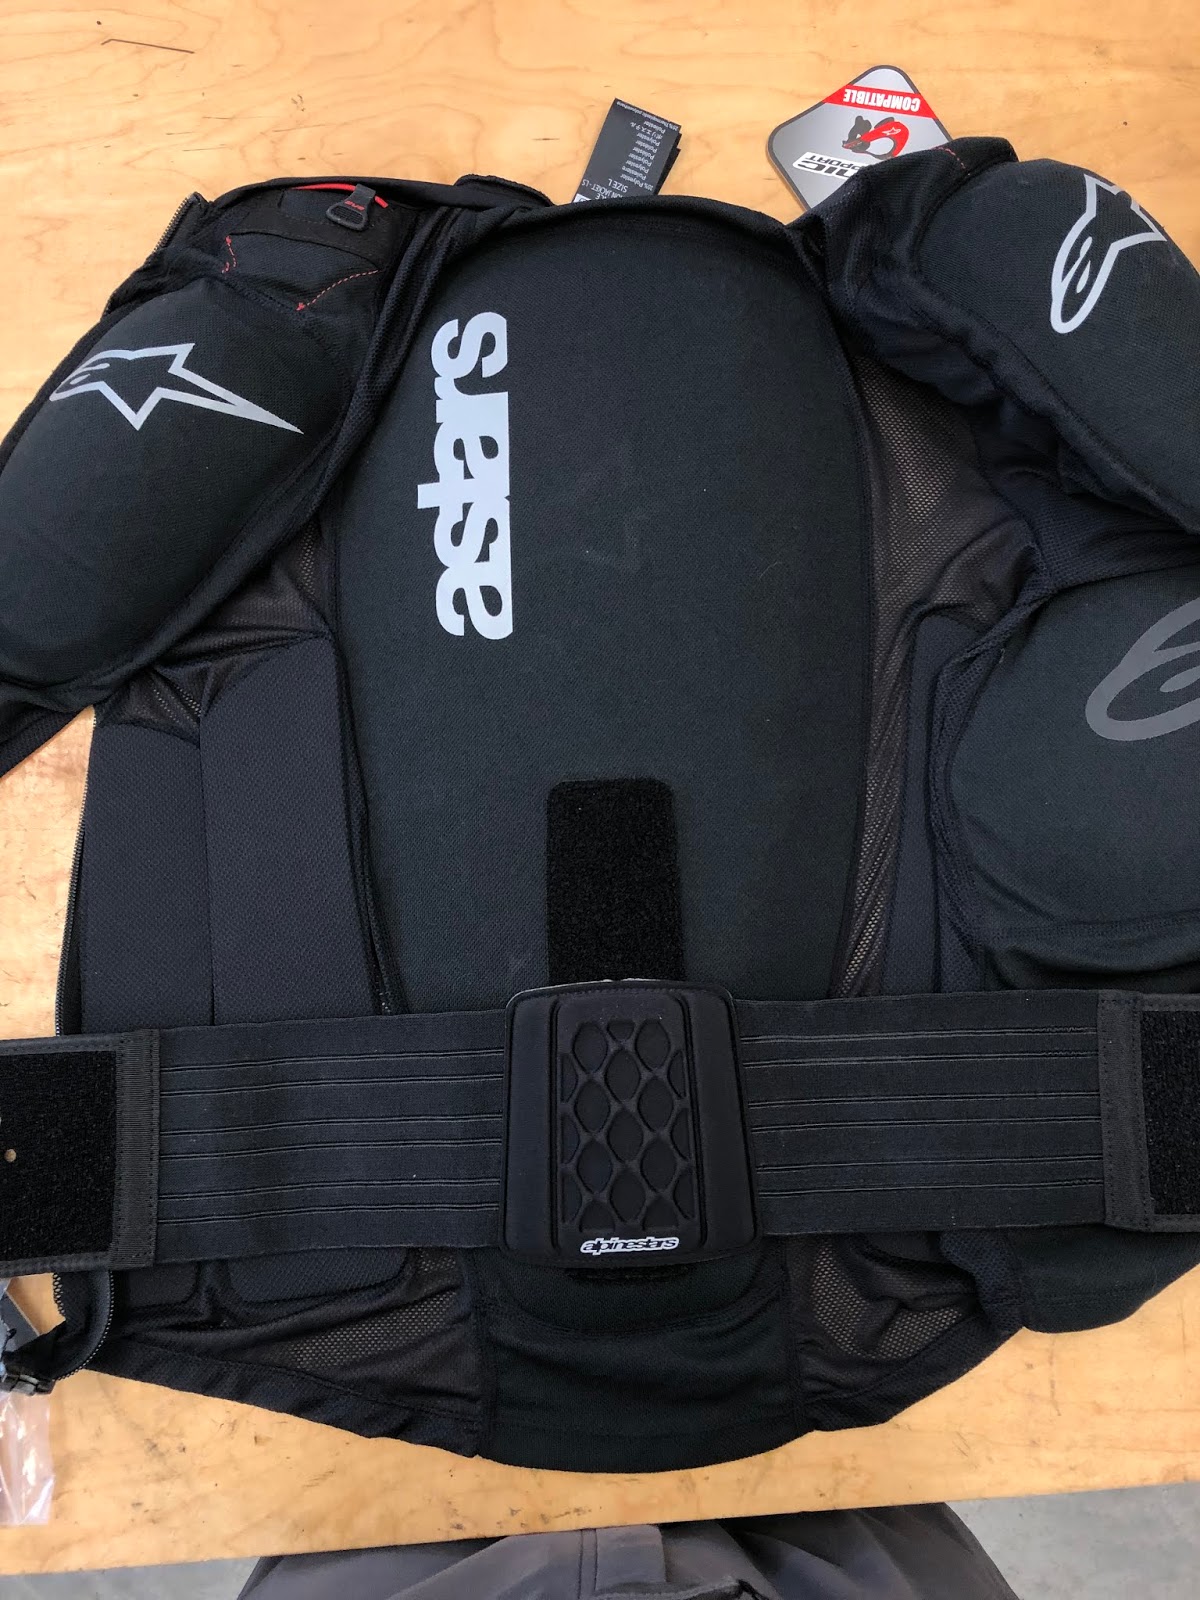
Alpinestars just released this new armored jacket, and I was intrigued to try it instead of my TekVest for less technical off-road riding on the theory it would be lighter, easier to fit under the Klim jersey, and easy to fit under the Carlsbad jacket.
The Sequence utilizes a lightweight, highly breathable mesh chassis with sewn-in CE-1 armour which includes a chest guard. It's not at all suitable to be worn by itself: it would be shredded by any minor impact. But under a jacket it should do fine. It offers better coverage than the armour that comes with the Carlsbad, as well as a removable kidney belt. You can see here how thin that mesh is around the neck.
An important limitation of this style of protection is the inability to wear layers with it, like you can when the armour is incorporated into a jacket. Not an issue for summer riding, but something to consider on a long trip. Also, I would question the durability of the mesh fabric over a long trip. It seems too easy to rip the neck area when putting on the jacket. I may modify the design to add some structural fabric in this area.
Ultimately, this jacket may prove to offer limited utility to only certain specific riding conditions. I think I'm back to the drawing board on finding better elbow pads so I can continue to use my TekVest for all riding.