
DJI makes high quality products and the Mavic Mini is no exception. It packs a decent camera with gimbal stabilization, high quality components, and up to 30 mins of flight time per charge into a package that folds up neatly and fits into the palm of your hand. This makes it ideal for carrying along on hikes and rides. However--and as with any gadget--if you don't make it easy to access, you're unlikely to use it and then it just becomes aspirational deadweight. So the challenge was how to make the drone readily accessible on the Tenere 700 while riding solo, so I could get some interesting shots while actually riding with gloves and helmet on.
Like most of DJI's drones, you need some kind of screen (mobile phone or tablet) to view and control the camera while in flight. It's important that you check the compatibility of the phone or tablet you plan to use, because not all options will work (or work reliably) with DJI's flight apps (for the Mavic Mini, it's DJI Fly). DJI has put most of their effort into being compatible with Apple devices, so if you're using Android it can be a bit of a compatibility crap-shoot. I originally used an iPhone 8+ for flying, but since that's my company phone and short on storage, it wasn't a long-term option. The DJI Fly app and the video it record during flight can quickly fill several gigs of storage.
At the same time, I wanted a screen for two other purposes on my bike. One is navigation, hopefully to replace the outdated and clunky functionality of my Garmin Montana GPS. (More on this in another post, but for now I'll say that the OsmAnd+ and Locus Maps Pro apps are solid options.) The other reason for a dedicated second screen is to control my GoPro Hero 8 camera. The GoPro app provides a camera preview mode, remote control, and other features that become essential when your camera is mounted where you can't easily see or access it with a helmet and gloves on. Between the DJI, navigation, and GoPro apps, a dedicated screen and mounting solution compatible with gloves was essential.
Initially I looked for a small tablet since the larger screen size would aid visibility when flying or navigating. Samsung's ruggedized Galaxy Tab Active 2 tablet seemed perfect, but its hardware is now outdates and slow, and I could find no information to confirm its compatibility with DJI Fly. Next I considered an iPad Mini, since there are lots of good used options. However, it has questionable durability and an unknown IPX rating against dust and moisture ingress, and apparently it doesn't support the DJI Fly app at native high resolution, defeating the whole purpose of a larger screen. Eventually I settled on a used, unlocked Samsung Galaxy 8 Active in pristine new condition. This is a ruggedized version of the regular Galaxy 8 and has a similar screen size to the iPhone 8+. Even better, it has an SD card expansion slot which is perfect for caching video images, map files, GPX files, etc. and the touch screen works with gloves on. No fingerprint reader to obey! Without a SIM card and stripped of unnecessary software, it's performed well in controlling the Mavic Mini. I've also paired it with my Packtalk Bold helmet comms so I can hear important notifications from the DJI Fly app. The question then was how to get everything set up on the bike.
Recently I bought two Mosko Moto tanks bags in the hopes their ready access to gear outweighs my dislike of how tank bags interfere with standing on the pegs. The larger of the two, the Hood model (5L capacity) provides a nice flat top with Molle straps for attaching gear. The other bag is the Pico. Here you can see the two bags side-by-side.

At 1L capacity, the Pico is just large enough to hold the drone and two extra batteries (giving a total of 90 mins flight time). It too has a flat top with Molle straps, so this is what I decided to work with. In practice, the Pico has far less than 1L of capacity because of the internal frame design. It should be called the Femto since it barely fits my iPhone 8+ or eyeglasses case.

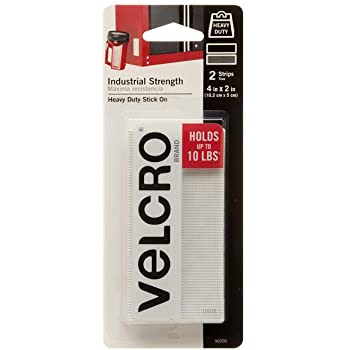
After looking at various gadgets to connect DJI controllers to larger phones and tablets, I decided that Velcro would likely suffice and got some of the 10lb-rated self-adhesive patches. These have a thicker, heavier hook pattern than regular Velcro.
I cut and stuck small patches to a phone case for the Galaxy, and to the DJI controller. The result is a reasonably solid connection to Mosko Moto's Velcro pad which attaches to the Molle straps. The Velcro pad will flop around a bit unless you offset it to the Molle straps and then weave it into place using the pair of Velcro straps it comes with. The result is a surprisingly stiff yet sufficiently flexible base to attach the controller and phone. The pad can be affixed to either the Pico or Hood tank bag the same way.


The Mavic Mini kit includes a cable to connect the controller to the phone, but it's too short for my setup. After much searching online, I eventually found a slightly longer Micro USB to USB C cable. A quick test confirms this cable supports the video data rate transmitted from the controller (some cables only support charging, not high-speed data).

Having experimented with this setup, I can say it works very well for quickly setting up the drone, launching, and positioning a shot--even with gloves on and while sitting on the bike. Now I'm able to start filming within a couple of minutes, and once the drone is in place, I can ride through the scene to get some action footage with little risk of bumping the controller and moving the drone. For multi-day trips, I'd use the larger tank-bag so I can include the various chargers needed to keep the drone and GoPro running. Their proximity to the USB port I installed in the dash make them easy to plug in with a standard cord.
While the Mavic Mini is a great starter drone, it has three significant constraints which aren't deal-breakers, but do limit what and where you can film:
- The camera, while generally excellent at this price point, has limited ability for manual exposure control. There are some excellent videos on YouTube about how to work around this and improve image quality. It's worth spending some time to figure it out before you try to ride and shoot. Note: DJI has now issued a firmware update (V01.00.0500) to enable manual exposure control. It requires DJI Fly v1.0.8 or later and includes some other valuable video and control improvements. (Update: Combined with a set of neutral density filters--I'm using the Freewell set--the new manual camera settings produce great image results.)
- There's no "follow" mode, which means unless you're an incredibly talented pilot, you're pretty much limited to static shots that you ride through. The Mini has three built-in dynamic shots, but setting them up for effective use while riding requires significant practice. It's understandable why DJI didn't include follow-mode in an entry-level, low-cost drone since it requires additional sensors. Still, if they offer this capability in a future Mini model, it would be a category killer and yet unlikely to cannibalize sales of their larger drones because of the next point.
- Being so light, the Mini struggles to fly in breezy conditions. I've found this generally limits flying to mornings and evenings, before the heat of the day stirs up wind. You need to be mindful of potentially strong winds up high, even if things seem calm at ground level. Otherwise the drone could simply blow away, and there you are in a helmet and riding gear wondering how or even if you can retrieve it.
No comments:
Post a Comment