Thursday, December 31, 2020

Fat biking in Bennies Corners

This is part of the trail network I helped create with Phil Maier and a bunch of other dedicated volunteers. 2020 was my last year of direct involvement in building and maintaining our local trails, after 10 years of sweat and smiles. The trail-building torch is now passed on to a new group of volunteers who have done a great job of building out the network, leaving me more time and options to ride!

The Bennies Corners and Sugarbush sections (located across from each other on the 7th line Ramsay Township) are groomed with a Snow Dog by Phil and his crew. This year there's been unusually little snow, so the trail is bare, icy, and treacherous in many places. Studs recommended, although I don't ride with them. (I refuse to pay $350 per tire for studs!) Also strongly recommended that you bring a spare tube if you ride tubeless, and unless there's snow, keep your tires pumped above 12 psi or you're likely to pinch-flat on jagged rocks. Of my last three rides here, I flatted and broke a crank bolt on one (resulting in a 3 lm walkout because I forgot my tube in the car), and bent a derailleur hanger on another. Third time lucky: no damage!

If you ride all the options at Bennies Corners, you can easily clock about 15km of mostly flowy single track. Highly recommended for a day trip in the Ottawa area. Parking available at the end of the 8th line (just past the Mill of Kintail), or along the road on 7th line. Note that the 8th line entrance can be mushy after a thaw. The 7th line/Sugarbush entrance allows you to warm up on the easy Sugarbush section before heading into the more technical options on the Bennies Corners side of the road.

Friday, December 25, 2020

Passages - A short ADV movie

Once again, the combined demands of work, family, and the pandemic have kept me away from posting updates, but I can assure you there's some good stuff to come. This past summer was spent riding as much as possible, exercising the Tenere and getting the suspension tuned, filming some rides, and prepping for another edition of the Ride Around Algonquin Park (RAP)--this time in a much more expanded loop up to Timmins, and with my two riding buddies from our 2018 Continental Divide Ride. More to tell about all that later.

Meanwhile, I've also been learning how to use Final Cut Pro to make movies and have just completed my first exercise which revealed a lot more learning is required. Anyway, I'm happy with the results--except for a few glitches which I had fixed but then must've accidentally undone before finalizing. 

So here it is. Enjoy!


Thursday, August 13, 2020

Tenere 700: Tie-down bracket on passenger foot pegs for soft luggage

The set of Enduristan Blizzard XL soft saddlebags I'm fitting to my Tenere require a tie-down point at the passenger foot pegs. Since I'm not using and have removed the passenger foot pegs, I need a place to loop the lower bag straps since I don't want them wrapping directly around the frame (that'll wear through the finish). R&G Racing offers a nice pair aluminum tie-downs like the one below, which bolt into the foot peg holes. Nice design, but also about CAD$130 and overkill for my needs.

I opted to make my own brackets.  

The bolt holes for the foot pegs are on 70mm centres. I figured that one bolt alone (I'm using the original foot peg bolts) should provide plenty of mechanical strength for a 1" nylon baggage strap. But to ensure the strap stays in place, I needed to make a simple bracket from 3mm T6061 scrap aluminum I had lying around. The bracket bridges the two mounting bolts, providing some additional mechanical strength. A few minutes with a hacksaw, file, and drill press had two nice brackets fabricated. I used some aluminum tubing (1/2" dia.) cut to 14mm length as bolt spacers. Total cost about $0 and an hour of effort, since I had the scraps lying around. But if you had to buy the aluminum, tubing, and paint, you're still looking at <$20 with lots of material left over.

The tubing takes the bulk of the load from the webbing loop which pulls up to the rear, in line with the frame tube. Some light sanding, rounding of edges, and coats of Krylon had the end product looking pretty good. 

I though about sliding some plastic tubing over the brackets to provide additional protection for the straps, but this is probably unnecessary. 

Since the Enduristan Blizzard bags are a rackless design, they are meant to press against the rear body panels. While the bags have some nice padding on the inside, I opted to apply some 3M film to the lower section of the paint to protect again inevitable wear from grit. Not the neatest application job, but this was my first time trying a wet application. I'll post the template I used in case you want to cut your own film. 


Next up is fitting the bags. An Adventure Spec top rack is also on its way, which may change my mounting method slightly. Will post on how it all comes together.

Thursday, August 6, 2020

More mountain biking trails in Lanark County

If you're looking for new places to mountain bike in the Ottawa area, happily there are several more options today than even five years ago. However, for a region that's chock-full of beautiful forests, rocky Canadian Shield, rivers, and parks--all the raw material to become a world-class mountain biking destination--it's still somewhat incredible and disappointing there isn't more single track available to the public. Nevertheless, the Ottawa Mountain Biking Association (OMBA) has worked tirelessly with the National Capital Commission to slowly ease open some trail access in Gatineau Park. Larose Forest has seen the recent and rapid development of a well-regarded trail network for summer and winter riding. Further up the Ottawa River Valley, BORCA and others continue to improve networks at Forest Lea and along the Ottawa River near Beachburg. 

Just 30 minutes west of Ottawa in Almonte, I'm happy to report that the Mississippi Valley Trails (MVT) network I started with a small group of volunteers ten years ago is now enjoying rapid expansion and improvements for summer and winter riding as well. I've now passed over stewardship of the trail network to the Lanark County Mountain Biking Association (LCMBA) which is run by the same group of volunteers. Originally we had the trail insured and organized under the auspices of OMBA, but with the growth of local activity it made sense to form a new, separate trail management organization with its own liability insurance. 

As with any trail network, maintaining access depends on users respecting the landowners and trail rules. This spring we lost access to one section of private lands connecting the MVT section to the Mill of Kintail and Bennies Corners sections. This was unfortunate, because it meant splitting what used to be an almost 30km out-and-back ride into two separate areas with no good connection between them. However, it's understandable why the landowner closed access: a small minority of riders and dog-walkers consistently ignored requests to stay on the trail (or stay off it altogether when the entry was barricaded) and trespassed onto actively farmed lands. 

On a personal note, after ten years of grubbing out single track and wrangling land access, I need a break to deal with other life events and to spend more time actually riding. LCMBA has a good handle on taking the network to the next level. I'm thankful for LCMBA's efforts, and the growing popularity of the trails is proof that things are headed in the right direction for year-round riding. Ten years ago I knew everyone who rode; now it's rare if I run into someone I know. If you haven't checked out the LCMBA network, it's well worth a day trip. Almonte also offers many excellent options for food and drink before or after your ride. You can even jump into the river to cool off at Rock Bottom, the historic swimming hole just downstream of the town along the MVT section. 

As always, please respect the core trail rules: stay on the trail, ensure your pets are leashed, and do not leave litter or poop bags. If you're considerate of the landowners, there will be more opportunities to grow and maintain the network for many more years to come.

Tuesday, August 4, 2020

Review: Motorcycling with a DJI Mavic Mini drone


Bringing a drone along for the ride opens up some interesting possibilities for exploring beyond the trail and capturing great shots of your adventure. After spending far too many hours researching drone options online, I bought a DJI Mavic Mini from Dr. Drone (excellent service and pricing!). A key reason for choosing the Mini was that at 249g, it's just under Canada's 250g limit before a drone pilot license is required. While I plan to get certified some day, for now I figured it'd be smart to learn with something relatively cheap before splurging on more expensive gear (e.g. a Mavic Air 2). 

DJI makes high quality products and the Mavic Mini is no exception. It packs a decent camera with gimbal stabilization, high quality components, and up to 30 mins of flight time per charge into a package that folds up neatly and fits into the palm of your hand. This makes it ideal for carrying along on hikes and rides. However--and as with any gadget--if you don't make it easy to access, you're unlikely to use it and then it just becomes aspirational deadweight. So the challenge was how to make the drone readily accessible on the Tenere 700 while riding solo, so I could get some interesting shots while actually riding with gloves and helmet on. 

Like most of DJI's drones, you need some kind of screen (mobile phone or tablet) to view and control the camera while in flight. It's important that you check the compatibility of the phone or tablet you plan to use, because not all options will work (or work reliably) with DJI's flight apps (for the Mavic Mini, it's DJI Fly). DJI has put most of their effort into being compatible with Apple devices, so if you're using Android it can be a bit of a compatibility crap-shoot. I originally used an iPhone 8+ for flying, but since that's my company phone and short on storage, it wasn't a long-term option. The DJI Fly app and the video it record during flight can quickly fill several gigs of storage. 

At the same time, I wanted a screen for two other purposes on my bike. One is navigation, hopefully to replace the outdated and clunky functionality of my Garmin Montana GPS. (More on this in another post, but for now I'll say that the OsmAnd+ and Locus Maps Pro apps are solid options.) The other reason for a dedicated second screen is to control my GoPro Hero 8 camera. The GoPro app provides a camera preview mode, remote control, and other features that become essential when your camera is mounted where you can't easily see or access it with a helmet and gloves on. Between the DJI, navigation, and GoPro apps, a dedicated screen and mounting solution compatible with gloves was essential. 

Initially I looked for a small tablet since the larger screen size would aid visibility when flying or navigating. Samsung's ruggedized Galaxy Tab Active 2 tablet seemed perfect, but its hardware is now outdates and slow, and I could find no information to confirm its compatibility with DJI Fly. Next I considered an iPad Mini, since there are lots of good used options. However, it has questionable durability and an unknown IPX rating against dust and moisture ingress, and apparently it doesn't support the DJI Fly app at native high resolution, defeating the whole purpose of a larger screen. Eventually I settled on a used, unlocked Samsung Galaxy 8 Active in pristine new condition. This is a ruggedized version of the regular Galaxy 8 and has a similar screen size to the iPhone 8+. Even better, it has an SD card expansion slot which is perfect for caching video images, map files, GPX files, etc. and the touch screen works with gloves on. No fingerprint reader to obey! Without a SIM card and stripped of unnecessary software, it's performed well in controlling the Mavic Mini. I've also paired it with my Packtalk Bold helmet comms so I can hear important notifications from the DJI Fly app. The question then was how to get everything set up on the bike.

Recently I bought two Mosko Moto tanks bags in the hopes their ready access to gear outweighs my dislike of how tank bags interfere with standing on the pegs. The larger of the two, the Hood model (5L capacity) provides a nice flat top with Molle straps for attaching gear. The other bag is the Pico. Here you can see the two bags side-by-side. 


At 1L capacity, the Pico is just large enough to hold the drone and two extra batteries (giving a total of 90 mins flight time). It too has a flat top with Molle straps, so this is what I decided to work with. In practice, the Pico has far less than 1L of capacity because of the internal frame design. It should be called the Femto since it barely fits my iPhone 8+ or eyeglasses case.


After looking at various gadgets to connect DJI controllers to larger phones and tablets, I decided that Velcro would likely suffice and got some of the 10lb-rated self-adhesive patches. These have a thicker, heavier hook pattern than regular Velcro. 


I cut and stuck small patches to a phone case for the Galaxy, and to the DJI controller. The result is a reasonably solid connection to Mosko Moto's Velcro pad which attaches to the Molle straps. The Velcro pad will flop around a bit unless you offset it to the Molle straps and then weave it into place using the pair of Velcro straps it comes with. The result is a surprisingly stiff yet sufficiently flexible base to attach the controller and phone. The pad can be affixed to either the Pico or Hood tank bag the same way.


The Mavic Mini kit includes a cable to connect the controller to the phone, but it's too short for my setup. After much searching online, I eventually found a slightly longer Micro USB to USB C cable. A quick test confirms this cable supports the video data rate transmitted from the controller (some cables only support charging, not high-speed data). 


Having experimented with this setup, I can say it works very well for quickly setting up the drone, launching, and positioning a shot--even with gloves on and while sitting on the bike. Now I'm able to start filming within a couple of minutes, and once the drone is in place, I can ride through the scene to get some action footage with little risk of bumping the controller and moving the drone. For multi-day trips, I'd use the larger tank-bag so I can include the various chargers needed to keep the drone and GoPro running. Their proximity to the USB port I installed in the dash make them easy to plug in with a standard cord.  

While the Mavic Mini is a great starter drone, it has three significant constraints which aren't deal-breakers, but do limit what and where you can film:
  • The camera, while generally excellent at this price point, has limited ability for manual exposure control. There are some excellent videos on YouTube about how to work around this and improve image quality. It's worth spending some time to figure it out before you try to ride and shoot. Note: DJI has now issued a firmware update (V01.00.0500) to enable manual exposure control. It requires DJI Fly v1.0.8 or later and includes some other valuable video and control improvements. (Update: Combined with a set of neutral density filters--I'm using the Freewell set--the new manual camera settings produce great image results.)   
  • There's no "follow" mode, which means unless you're an incredibly talented pilot, you're pretty much limited to static shots that you ride through. The Mini has three built-in dynamic shots, but setting them up for effective use while riding requires significant practice. It's understandable why DJI didn't include follow-mode in an entry-level, low-cost drone since it requires additional sensors. Still, if they offer this capability in a future Mini model, it would be a category killer and yet unlikely to cannibalize sales of their larger drones because of the next point. 
  • Being so light, the Mini struggles to fly in breezy conditions. I've found this generally limits flying to mornings and evenings, before the heat of the day stirs up wind. You need to be mindful of potentially strong winds up high, even if things seem calm at ground level. Otherwise the drone could simply blow away, and there you are in a helmet and riding gear wondering how or even if you can retrieve it.
Technology aside, the real fun is in finding creative ways to get interesting shots with what you've got. Moreover, none of these gadgets are useful if you don't do something with the footage. That means developing your photography and film-making skills, learning how to use video-editing software, and becoming disciplined enough to edit down hours of probably dull content to show off just the bits that tell an interesting story. For software, I started off using iMovie because it was already installed on my computer, but I quickly found it to be too limited in capabilities. Final Cut Pro was a reasonably priced upgrade and has powerful editing features that are easy to use. Still, lots to learn before I have any results I'll feel comfortable sharing!

Monday, August 3, 2020

Tenere 700: Review at 3800km


Everyone wants to check out my bike and asks me how I like it. I love it. Now that some of the lustre has dulled and it's covered in dirt (as it properly should be) after 3800km of mostly gravel and forest roads, here's my update on how the love affair continues. For reference, I'm coming from a modified WR250R (which I still have) and a 2019 Africa Twin (which I bought new and sold after only two weeks of riding because it just didn't click with me). 

Isn't is top heavy? 
Nope. Even with a full tank, it carries its weight surprisingly well. Cornering and low-speed handling is precise and controlled, even on dirt. There isn't that feeling of "oh sh*t!" when leaning too far; the bike just turns and sticks. Even on dirt at speed, it doesn't have that feeling of running away from you if you hit a corner too hard and risk going into the rhubarb. For comparison, my Africa Twin felt ponderous, like a container ship plowing through heavy seas. The Tenere feels like a speed boat going over the waves. It feels about as top-heavy as my WR250R which is taller and has an aftermarket tank with the volume as the Tenere's. 

Yeah, but my 790 Adventure R / Modified DR650 is way lighter!
So what? There's always going to be some other bike that does something else better or worse, or has better specs on paper. What really matters is how your bike feels for you. Does it let you ride what you want and have fun? The Tenere does that for me: it feels just like my WR250R but with 2.5X more power, which really puts a smile on my face. It has way better traction control because of that smoooooth CP2 engine. My riding skills are absolutely the limiting factor in what the Tenere can do; not the extra weight. Pol Tarrés is proof of that!

How's the suspension?
Now that I've got it mostly sorted out, it's pretty decent. Most reviewers agree that the rear spring is too soft if you're over 65kg (I'm 87kg buck nekkid). I upgraded to an 80N-mm spring from Rally Raid and, with the preload at zero, the rider sag is now -60mm (which will go down to the target -70mm or 30% with my usual gear on, since ridin' nekkid is generally frowned upon). For the forks, I kept the stock springs but installed the Rally Raid preload fork caps with 5mm spacer and three turns of the pre-load adjustment. This gives me -64mm of rider sag (30%). After fiddling with compression and rebound I found a decent compromise between street and dirt. Traction in dirt--even with the stock tires--is surprisingly good even at speed, so I figure the settings are good. However, I'm considering some re-valving this winter to improve high-speed compression/rebound performance. Overall though, the suspension is fine. I'll be loading up the bike with soft luggage soon and then will have a chance to see how it performs under load. 

Isn't the tank too small? Aren't you worried about running out of gas?
Nope. The gas gauge is a little wonky though: It doesn't move for the first 100km, then it drops a bar, then it starts racing towards empty. The Low Fuel light comes on when there's about 1/4 tank (3-4 litres) left! There's a solid 300km range, and probably 350km if you aren't hard on the throttle. I'll carry a 1-gallon RotoPax for longer trips because I don't like to plan more than 300km between fill-ups to allow for the inevitable extra distance from wrong turns, etc. Overall I've been seeing about 3.6-4.6 l/100km fuel economy under spirited riding, and I'm probably averaging about 4.3-4.5l/100km on longer, steady stretches.

How's the wind protection?
I'm just over 6' or 183cm and I wear a peaked helmet (Shoei Hornet). There is almost zero buffeting of the helmet, quite unlike my experience on the Africa Twin. If I duck down about 2", there's a quiet pocket of air and the wind noise is substantially reduced. Anyone shorter than me is going to have a great experience with the wind protection. I don't find the wind noise too bad though; I ride with ear plugs anyways. It's not so loud that I can't enjoy music on my Packtalk Bold headset. Overall I find the protection pretty good and I don't plan to change anything. It's a motorcycle, not a luxury car. 

What would you change?
These are the mods I've made, and all of them have proven worthwhile:
  • Rally Raid fork preload caps
  • Rally Raid shock spring (80 N-mm)
  • Rally Raid stainless steel from hub spacers
  • CamelADV anti-bobble brace for tower
  • Outback Motortek skid plate (essential; the stock guard is pretty flimsy)
  • Outback Motortek lower engine guards
  • B&B Offroad tail tidy
  • Eastern Beaver PC-8 switched power bus
  • Oxford heated grips
  • USB port
  • R&G Racing case covers (protects the water pump and more)
  • Barkbuster Storms
  • Doubletake Mirrors
  • AdventureSpec rear rack (on order; not installed yet)
  • Rally Raid GPS mount
  • Yamaha chain guide (essential)
  • Yamaha radiator guard (essential)
  • Wider pegs (to come)
I didn't mind spending a couple grand on the above farkles because it got me the bike I wanted and all bikes need some customizing anyway. I didn't spring for the adventure seat because I'm waiting to see what Seat Concepts comes up with. The stock seat isn't too bad for me anyway. It's a more compact riding position than on my WR250R, but somehow not as uncomfortable as I initially expected. 

I plan to install a set of Cyclops LED lights because the stock lights, while not bad, don't provide as much coverage as I'd like for our gloomy fall riding.

The stock tires, Pirelli Scorpion STRs, handle very well on gravel and pavement. Kudos to Yamaha for putting on decent rubber. I have a Motoz Tractionator Adventure rear and Shinko 804 front waiting to go on next. 

But don't you miss all the electronics and traction control?
Nope. Had that on the Africa Twin and found it got in the way of just enjoying the ride. I wish the Tenere's ABS off-switch stayed off when the ignition is on but the engine is killed, because that would eliminate a lot of button-pushing during frequent stops. Overall the display works fine. I spend most of my time watching the scenery anyway.

If there's one thing I would change, it's Yamaha's location for the selector switch on the right side. It's almost impossible for me to push it with my right thumb while riding. A thumb switch on the left side would probably work much better. This winter I may see what I can rig in parallel to the OEM switch. 

How is it to service?
Yamaha has put a lot of thought into how this bike is assembled and as a result it's extremely simple to strip down for access to things like the oil filter, air filter, etc. Changing tires is a bit fiddly with the twin front rotor, but entirely doable. By comparison, the Africa Twin was a nightmare in all respects.

The engine is only 72 HP! Every KTM since 1973 is at least twice as powerful!!1!1! 
Yeah, I don't feel like I'm missing out on power except maybe when I'm passing at top highway speed in a headwind going up a steep hill. But that's a tiny percentage of my riding time. Most of the time I'm on rural roads, gravel, dirt, rough terrain. The 72 or however many ponies are more than enough to spin the tire and have a blast. What that number doesn't tell you is how electric-motor-smooth the engine is, and how torquey it is at low RPMs. You can crawl along in 2nd or 3rd, give it some gas, and spin up to speed in no time. The engine is a beautiful work of tractable power. Easy to ride all day long at any speed, standing or sitting. 

Does it need bar risers?
No. At 6' tall, I find the riding position nicely balanced in stock form. I did rotate the bars forward a touch though. 

Conclusions
If you like the WR250R, you'll probably love the Tenere 700. It's just a big WRR, with all the power that the little 250 could never deliver, and at only a small perceptible weight penalty. If you prefer the edgy, full-concentration, high-strung power and handling of a KTM, you'd probably find the Tenere to be a little boring perhaps. If you're riding an 800GS or similar BMW, you'd probably find the Tenere to be just as much bike but slimmer and lighter-feeling in your hands.

This summer I'm doing a longer tour with luggage, and we'll see how the Tenere performs under load. 

Sunday, August 2, 2020

Ibis Hakka MX gravel bike: Review


With all the hype around gravel bikes recently, it's perfectly understandable why you may be rolling your eyes at the thought of adding yet another miracle-bike to your quiver. So let's cut to the chase: If for some horrible reason I had to choose to keep just one bike in my own quiver (which includes high-end versions of a road bike, XC mountain bike, fat bike, single-speed, and now a gravel bike), it'd be the gravel bike without question. It's like buying a dual-sport motorcycle and I consider it my Tenere 700 of bicycles: not the fastest on the pavement or most capable in the extreme technical, but a perfect compromise for adventures and exploration.

I'm late to the gravel-bike craze but not new to riding gravel, having gotten into the dirty side of cycling back in 1987 when I first tried mountain biking in France, of all places. (At the time, road-riding was king and mountain biking was still only gaining a foothold in North America.) Of course, there was cycle-cross, and die-hard roadies were also no stranger to cobbled roads in the European race scene. But bikes for the rough stuff at the time were mostly steel or aluminum-framed, wheels were skinny and so was the rubber, and frame geometry was dominated by the hunched-over aero posture of the roadie world. Compared with today's purpose-built and finely-tuned machines, yesterday's bikes offer little in terms of comfort, handling, and performance on rough surfaces. Good riddance as far as I'm concerned! 

Enter Ibis Bicycles out of Santa Cruz, California. Unlike industry giants such as Trek and Specialized, Ibis and its mere dozen or so employees are well down into the boutique-brand category. But their pedigree reaches back to the very origins of mountain biking and they've justly earned a reputation for creating ground-breaking designs that encapsulate passion, and perform as exquisitely well as they look. At Ibis, innovation is incremental and thoughtful. They meticulously refine their designs and details to truly enhance the enjoyment of riding, rather than follow the latest flashy trends.

The Hakka MX carbon frame with the matching Enve carbon fork is Ibis's only gravel offering and the only one they need to offer since it is capable of bike-packing as well. In choosing this frame I'd also considered options from Norco, Cervelo, and a few other brands. I ruled those out because I wanted a threaded bottom bracket, and many of the other brands have recently moved to press-fit because it's easier to manufacturer. For my purposes, I don't see practical benefits to a press-fit bottom bracket, and in fact it's more of a detriment in terms of maintainability. Choosing a threaded design reduced my options considerably, but fortunately the Hakka MX is a solid choice by any measure. 


While it's not the lightest frame set available (mine runs just over 1000 g in 58 cm), it's extremely solid and that's what I wanted given I'm 87 kg and tend to ride hard. Ibis offers a decent build kit around Shimano's new GRX group, but I worked with a local bike shop (Phat Moose - thanks guys!) to create a my own custom build which actually ended up being cheaper and lighter (the complete bike weighs 9.15kg or 20.1 lbs, which is quite respectable): 
  • Easton EA90 Cinch crankset, 1 x 11 with 40T chainring  
  • Wheels Manufacturing T47 bottom bracket
  • Shimano GRX RD-RX812 rear derailleur with CS-M8000 11 speed 11-40T cassette
  • Shimano GRX RX810 hydraulic disc brakes and levers
  • Easton EX70 bar stem (80mm, 7º) and EC70 AX carbon bar (46cm)
  • Race Face Next carbon seat post and WTB Volt saddle
  • DT Swiss 350 MTB hubs with XM401 700cc x 22.5mm rims and DT Competition spokes
  • Panaracer Gravel King SK 700x43mm tubeless tires
Although this is my first experience with 11-speed, I've been running 1x on my fat bike and mountain bike (Santa Cruz Tallboy) for years and have not felt the need to reinstall a front derailleur. Unless your consistently tackling extremely steep terrain, I've found modern cassettes to offer plenty of range for a 1x setup. If anything, I could use higher gearing for speed, and on the Hakka I indeed ended up swapping the 40T front ring for a 44T, since that was cheaper than replacing the cassette. This allowed me to run the chain one cog lower on the cassette, keeping the chainline more centered for the bulk of my riding at 30-35km/hr. With the 40T, I was usually running in 9th and 10th on the cassette, and I was concerned about accelerated wearing those positions.


The GRX shifts far lighter and smoother than the 1998-era, 9-speed DuraAce on my road bike. The levers have a broad, flat surface on the side which is easy to press for one-finger shifting when you're hands are slippery with sweat. No shifting issues whatsoever under load or extreme chain lines, and even though it's a narrower chain, no issues with grit or mud yet, either. All the cabling is fully internal, so no risk of crap getting in to affect shifting. When building the bike, I routed the rear brake line and derailleur housing after installing the bottom bracket. It was a little tight, but relatively easy to fish the ends around the bottom bracket shell by using a dental pick through the lower frame port.

The wheels may seem like an ususual choice. In fact, they're a set of 29er mountain bike wheels I'd built up under my Rugged Wheels business but never sold. Most people don't seem to understand that 29er rims are equivalent to 700cc road rims, and the older (100/142mm, non-boost) hub spacing is now a common standard for CX/road/gravel bikes with thru-axles. DT Swiss uses an ingenious design that lets you swap hub end caps to give you 15mm, 12mm, or QR fitment. I happened to have a set of 12mm QR caps so was able to convert the front wheel from 15mm to 12mm thru-axle in seconds. The Panaracer tires sealed up beautifully and the whole package handles really well on pavement and gravel.


While the Hakka fits the 42mm tires no problem, they tread leaves barely two millimeters of clearance under the nifty fender holder in the rear. This isn't a problem for me since I'm not running fenders, but I'd have to choose a smaller tire if I change my mind. The 42mm tires are fantastic for the roads I ride, which are often potholed or washboarded, or have a layer of fresh, loose gravel on them, requiring some floatation to ride safely. The wider tires complement the stiffer frame and carbon seatpost to offer the benefits of good tracking and pedaling efficiency, as well as long-term comfort. Similarly, I could've chosen to build up some carbon wheels, but I wanted aluminum for some compliance. (I run a similar wheel in carbon on my XC mountain bike, but in that case a stiff wheel is desirable for better tracking, given there's suspension to deal with the bumps plus additional flex from pivots, etc.)


Overall the Hakka bits me beautifully - I got lucky with the initial setup and have only needed to make minor tweaks to fit my 183cm height. Some riders report that the frame feels overly stiff, but for my weight it's been extremely comfortable and I've been continually surprised by how far I've ridden this bike before feeling the need for a short break. The combination of clutch derailleur and internal routing for brake and derailleur makes it an absolutely silent ride even on rocky descents. No creaking or irritating vibrations - just the sweet sound of file-tread tires zinging along. The bars are super comfortable to ride on the tops or hoods, although the shape of the drop grip will take some getting used to after my road bike. Spacing between the front tire and my size 11-feet is tight but so far I haven't hit the tread with my toes. The bike feels stable on the straights and is nimble on technical trails. I ran out of gearing on a 15% loose, technical uphill--but that's more of a rider flaw than bike; I would've struggled on my mountain bike as well. 

In the past month I've ridden almost 900km of gravel and trails on the Hakka. From the first time I swung a leg over it I can honestly say it's rekindled my passion for cycling. A good gravel bike opens up so many new route options to explore and avoid traffic, that I can't imagine why any avid cyclist wouldn't want to give one a try. Makes me feel like a kid again! 


Thursday, June 25, 2020

Tenere 700: Outback Motortek engine guards and skidplate

Oh boy, did I ever agonize over what skid plate and crash bars to choose! On the one hand were excellent options based on engineering requirements: these included guards and skid plate from Adventure Spec, the plastic skid plate from AXP Racing, and even the Yamaha OEM guards and skid plate. On the other hand, COVID's interference with supply chains made some options unavailable within a reasonable timeframe. Since I didn't want to get stuck with nothing for when my bike arrived in early June, my options converged to the lower crash bars and skid plate from Outback Motortek. They appeared to be in stock and I'd been satisfied with the versions I'd installed on my Africa Twin. 

Evidently, every other proud new owner of a Tenere in Canada had the same idea. My "in stock" items were actually sold out at the Canadian distributor and so I ended up waiting more than a month for delivery after placing my order. Now that I've finally sorted out the installation, here are my observations and recommendations in case you're considering the same parts. 


First, Outback Motortek is widely recognized as having good stuff. Their materials, design, fit, and engineering all seem pretty solid and the company takes pains to test the practical effectiveness of their products. So, no real concerns about the engineering. I didn't opt for the full (upper) crash bars because of the weight they posed up high, and I figure that the combination of lower engine guards with pannier rack and panniers will provide adequate protection for low-speed tumbles. (R&G engine case covers are also on order to protect the vulnerable water pump.)

The high molecular weight tape inside the frame clamps is a nice touch to protect your bike. However, the clamp was more than snug on the frame, and tightening the bolts proved tricky. 


Some customers have reported poor finishing on some of Outback Motortek's parts lately (e.g. weld spatter and uneven fill) as well as some fitment being a nuisance. Both my left and right guards showed some of these minor problems, but they were easily resolved. 

The hardware included in my kit did have one significant shortcoming. Each guard uses an M12 bolt inserted through a 15mm high collar to mount the midpoint of the guard to the engine case through a frame member. The right-side bolt is 50mm long; the left side about 35mm. Since they thread into a major load point, you need a solid connection. However, the longer of the two M12 bolts provided in my kit was only about 55mm long--too short to provide more than about 6mm of thread inserted into the engine case. There's no way I'd compromise the connection strength at this location with such little thread insertion, where at least 20mm is required as per the OEM bolt. 

The following pic shows the OEM M12 engine bolt for the right side (black; 50mm long) compared with the longer of the two bolts provided in the kit (55mm; silver, in the middle). On the right side is a 65mm bolt which I ordered to ensure sufficient thread insertion. The specification of the 65mm bolt is:

M12-1.25 x 65mm, DIN960 Class10.9 Zinc (note the thread spacing of 1.25mm; 1.50 mm is more common in M12). Fastenal.ca carries this as part #11114018, cost of $2.00. The 65mm bolt has a 19mm hex head vs. 17mm for all the other bolts; I couldn't find a 17mm version. 


Here's the right side OEM bolt compared to the new 65mm bolt in the same position. The photo distorts the length difference; they're actually very close. 


For the left side engine guard, you can re-use the 50mm OEM bolt from the right side since it gives exactly the extra 15mm you need to ensure sufficient threading (and is the same length as the longer of the two kit bolts I received). Here's the 50mm bolt from the kit mounted in the collar and compared with the OEM left side bolt. Don't forget to use a washer when installing either of the 50mm bolts on the left side. 


The inside of the collar had a rough weld that needed a bit of filing so the bolt would sit flush.


The easiest way to install the guards is to first remove the two front body panels on each side of the bike (i.e. the panel with the turn signal attached and the small vented panel next to it). This provides access to properly align, hand-thread, and then torque the engine bolts to 75 N-m. I was not able to fit a socket onto the left side engine bolt because the guard was in the way (a minor design flaw). The two M6 hex bolts for the upper guard attachment point should be torqued to 30 N-m. Note that Yamaha thoughtfully made the OEM bolts long enough to accept the guard and ensure complete threading. Here are the OEM bolts (black) compared with the kit bolts. The OEM bolts on the left side have little rubber sleeves over the extra exposed thread on the inside. 


I found it easiest to install the engine bolt first, then the two M6 hex bolts at the top, then the lower cross-bar bolts, then the lower frame bolts for the U-bracket. 

The finished assembly seems to be sturdy. 


If I was choosing engine guards again, I'd probably opt for the Yamaha guards since they seem to have held up well for Nick Sanders and the two KAP2CAP riders. Plus they give the option to mount small bags, which is appealing. However, for my modest needs, the lower guards should do just fine.

As for the skid plate, it's a no-brainer to install and is a serious upgrade from the flimsy stock guard. I added a patch of 3M sound deadening material to the inside bottom on the left side (away from the exhaust pipe) to help reduce ringing vibrations. This seems to work, based on a highly scientific finger-flick test. 


The Outback Motortek guard uses much thicker material. 


Wednesday, June 24, 2020

Tenere 700 tail tidy: B&B Off-Road Engineering

As with many Japanese bikes, the Tenere 700 comes with an OEM monstrosity of a number plate holder hanging far past the tail light and adorned with chinzy reflectors, where it's readily exposed to breakage on your first tip-over in the woods. As with my WR250R, one of the first mods to my Tenere has been to show that booty some love and install a tail tidy. 

Now that the Tenere 700 has been out for a year, those of us in North America who are now just getting the bike can benefit from a wide range of tail tidy options. CamelADV, Adventure Spec, Rally Raid UK, and R&G all offer some good options. 

But the one I chose comes from B&B Off Road Engineering out of Australia, where there's a solid Tenere 700 following and some of the hardest-core riders of this bike in the world right now. I chose B&B's tail tidy because it offers a solid reinforced mechanical design, it doesn't require cutting the OEM plastics, and it has a good fit and finish and a decent sealed LED plate light. Mine was the first to be delivered to Canada, and having received it only 10 days after placing my order, I installed it right away in one evening. 

For Canadians considering the B&B option, I recommend ordering direct from Australia because factoring in the exchange rate and $30 of duties, it ends up significantly cheaper (and probably faster) than ordering from B&B's US distributor. plus I had excellent service from Sarah at B&B, who was quick to let me know when shipping to Canada was re-opened following the COVID shutdown. Go Commonwealth! 

All the parts come nicely bubble-wrapped. The included hardware is mostly metric stainless steel. I replaced some of the nuts with stainless locknuts (M5). 

What's in the box

The tidy is made from aluminum, doubled in places with welded reinforcements. The whole thing is coated in a thick optional black finish (standard is silver) that looks like it should withstand significant abuse.

Here you can see the reinforcement plate for the turn signal stalk. B&B has an optional insert to allow you to install round, threaded signal mounts, which I plan to adopt when I can order some LED signals. 


This is the top plate that bolts into your subframe. Again, beefy construction. 


The number plate light is a completely sealed LED unit. Looks to be decent quality for both the plastics and wiring.


I like how the metal wiring cover reinforces the structure of the number plate holder. There's no flex in this system, so I don't expect any metal fatigue cracking. 


B&B includes easy to follow instructions to remove the OEM tail assembly. The Tenere 700 is so easy to work on... all the bolts are easily accessible and all you need are 8mm and 10mm sockets and a 4mm and 5mm hex to remove the body panels. Make sure you label your turn signals so you know which side to install them on--the wiring only connects one way! 

Installation is a breeze. To connect the number plate light, I cut off the OEM connector and spliced it into the B&B wiring with some heat-shrink tubing and electrical tape to reseal the harness cover. Connect the white and black wires together (ground) and brown and blue together (+12V). Check your wiring by turning on the key before putting everything back together.

When installing the tail tidy wiring cover, I had a bit of a challenge threading in the 10mm cap screws provided in the kit because of some minor deformation of the aluminum and plastic coating on the aluminum threads. One bolt went in fine, but the metal on the other side of the cover was lifted up a bit and the short fastener wouldn't quite reach. I used a longer bolt to clean out the threads and wind things in with all fasteners installed loosely, then replaced the long bolt with the correct shorter one. It's really not that fussy though, and it all went together fine. Fit overall is excellent and no filing or drilling was required except to mount a reflector bracket (see below) and my number plate (no holes are provided). 


Here's all the crap left over. Easily a couple of pounds of plastic and metal! 


One thing the B&B kit is missing is a way to attach a rear reflector. I made a simple bracket out of some scrap stainless steel and sprayed it black with Krylon paint. Last thing I want is to get hassled (or worse)  during a police stop because I'm missing a required reflector! 


This is the OEM reflector bolted on. I drilled three holes in the B&B number plate holder to attach the bracket using some stainless steel bolts. 


There's nowhere to attach side orange reflectors, but what's neat is that even when you remove the OEM plastics, Yamaha has thoughtfully included knurled handgrips under the outer handgrips for the pillion passenger. The flat area right above the grips is a perfect spot to attach some 3M reflective tape. The tape is flush to the surface and therefore protected, yet provides a wide view of 10 square inches of reflector per side, versus the 3 square inches provided by the OEM round reflectors per side. A good conspicuity upgrade in my mind! 


One last note is that the brake light has a small bit of foam stuck to the bottom where it contacted the OEM plastics. When you've installed the B&B kit, this foam doesn't touch anything. I peeled it off and reattached it further inboard so it wedged between the light and the B&B plate. While it doesn't look like the tail light will move around much on rough terrain, repositioning the foam adds a little bit of extra vibration protection.

Overall I'm very pleased with this kit. It's easy to install (couple of hours), solidly built, and looks great. With the addition of a rear reflector and the side tape, I see no reason why the bike shouldn't meet the same regulatory requirements as the OEM configuration. 

Monday, June 8, 2020

Changing the Tenere 700 rear shock spring

The Tenere 700 is widely reported to have rear suspension that is too soft for all but the lightest riders--never mind those carrying baggage as well. The solution is to install a stiffer shock spring in the range of 80-95 N-mm vs. the stock 69 N-mm. For details on what size spring to choose, check out Motorcycle Adventure TV's excellent and informative episode on tuning the Tenere suspension. It's a must-watch for anyone who wants to get the most out of this bike.

Having ordered an 85 N-mm spring from Rally-Raid for myself, the challenge became how to install it. Removing the rear shock assembly is actually pretty easy and takes less than 10 minutes:

  • Support the bike under the skid plate, leaving the rear wheel just kissing the ground.
  • Remove the small triangular body panels on the left and right sides (3 x M6 bolts each)
  • Remove the plastic mud flap between the wheel and the swingarm (2 x M6 bolts)
  • Remove the nut from the bolt holding the bottom of the shock piston to the linkage. It's a 15mm nut and 17mm bolt head. Tap out the bolt with a rod; you may need to wiggle the swingers to relieve a bit of pressure on the bolt.
  • Remove the nut from the upper shock bolt (19mm socket). Tap out the bolt with a rod while holding the shock from behind.
  • Remove the shock by lowering it into the swing arm and pivoting it up over the rear wheel. 
That's it! No removing the exhaust, disconnecting the whole linkage, or removing the wheel, as described in the service manual procedure.

After unsuccessfully trying an automotive spring compressor that just didn't fit the small diameter motorcycle spring, I found the ratchet strap method worked to compress the spring just enough to slip out the retainer. The ratchet strap method is probably fine for the stock spring's stiffness. But even with a third ratchet strap, it was no match for the force needed to compress the 85 N-mm spring to reinstall it safely. That 23% extra force of the stiffer spring left the straps rock-hard and probably at their safety limit. (Consider you need to compress the spring about 15mm to get enough clearance, which means applying 1275N or about 130 kg or 286 lbs of force. However, friction between the straps and coils probably doubles the force you need to apply.) Also, it proved impossible to steer the spring concentric with the piston so I could even attempt to insert the retainer. It just wasn't worth the risk of an explosive release if something failed. Time for a real spring compressor.

After calling around to six bike shops and powersports dealers, all were either unwilling to help, were backed up for weeks with other jobs, or simply didn't answer the phone. Amazingly, Canadian Tire was willing to give it a go, and their service department was open until 9 pm. They said it was a bit tricky to fit the smaller shock assembly into their strut compressor, but luck prevailed. 20 minutes and $40 later, my spring was mounted. Cheaper (and safer) than all the options I evaluated online. Point is, if you've run out of conventional options, try the unlikely options because you might get lucky.

Reinstalling the shock is the same steps in reverse; another ten minutes. Note that on the top bolt, there's a metal bracket to slip over the bolt end before you put on the nut. When fitting the bottom bolt, it helps to wedge a crowbar or piece of plywood under the rear tire so you can lever it up a smidge to align the shock and linkage holes. Torque both the upper and lower shock nuts to 45 N-m (33 lb-ft) as per the service manual spec. 


Now to see how that new spring rides!

Sunday, June 7, 2020

TENERE 700!!!

Finally!

After almost five years of waiting none-too-patiently, there was a blue (sorry, "Ceramic Ice") Tenere of my own to swing a leg over.

My dealer had called me on a Friday afternoon--as surprised as me--to say that a bike with my name on it had been dropped off unexpectedly at his store. Would I like to pick it up that afternoon? Well, that wasn't going to work because my wife and I were headed 100km in the opposite direction to get her a brand new e-bike (Trek Verve+ 3, for the curious; more on this later, as e-bikes are totally addictive form of two-wheeling).

But you're here for the Tenere, as was I the following morning.


What should've been a simple, 30-minute bit of paperwork ended up being a 3-hour epic while I stewed in my riding gear and my infinitely patient wife sat in the car (COVID and all) waiting to find out if I was going to be riding home on a Yamaha, or riding shotgun in her Honda. Yamaha Canada's dealer site was all messed up, not calculating my bill correctly and, in the end, requiring someone from their IT department to work some magic in the back-end system.

Got sorted just in time to leave ahead of some looking thunderclouds--reminiscent of last summer's experience picking up the Africa Twin.


As soon as I left the dealer's parking lot, I had to laugh: the dreaded instrument shake was unbelievable. Looked like somebody hadn't bolted things to the bike, but nope: that's a feature, not a bug. So if you're getting a Tenere and only do one mod, it should be fix the display shake. In anticipation of this, I'd already ordered the CamelADV stiffeners which fit perfectly, take about 20 minutes to install, and transform the tower into a readable form. This is your #1 accessory:


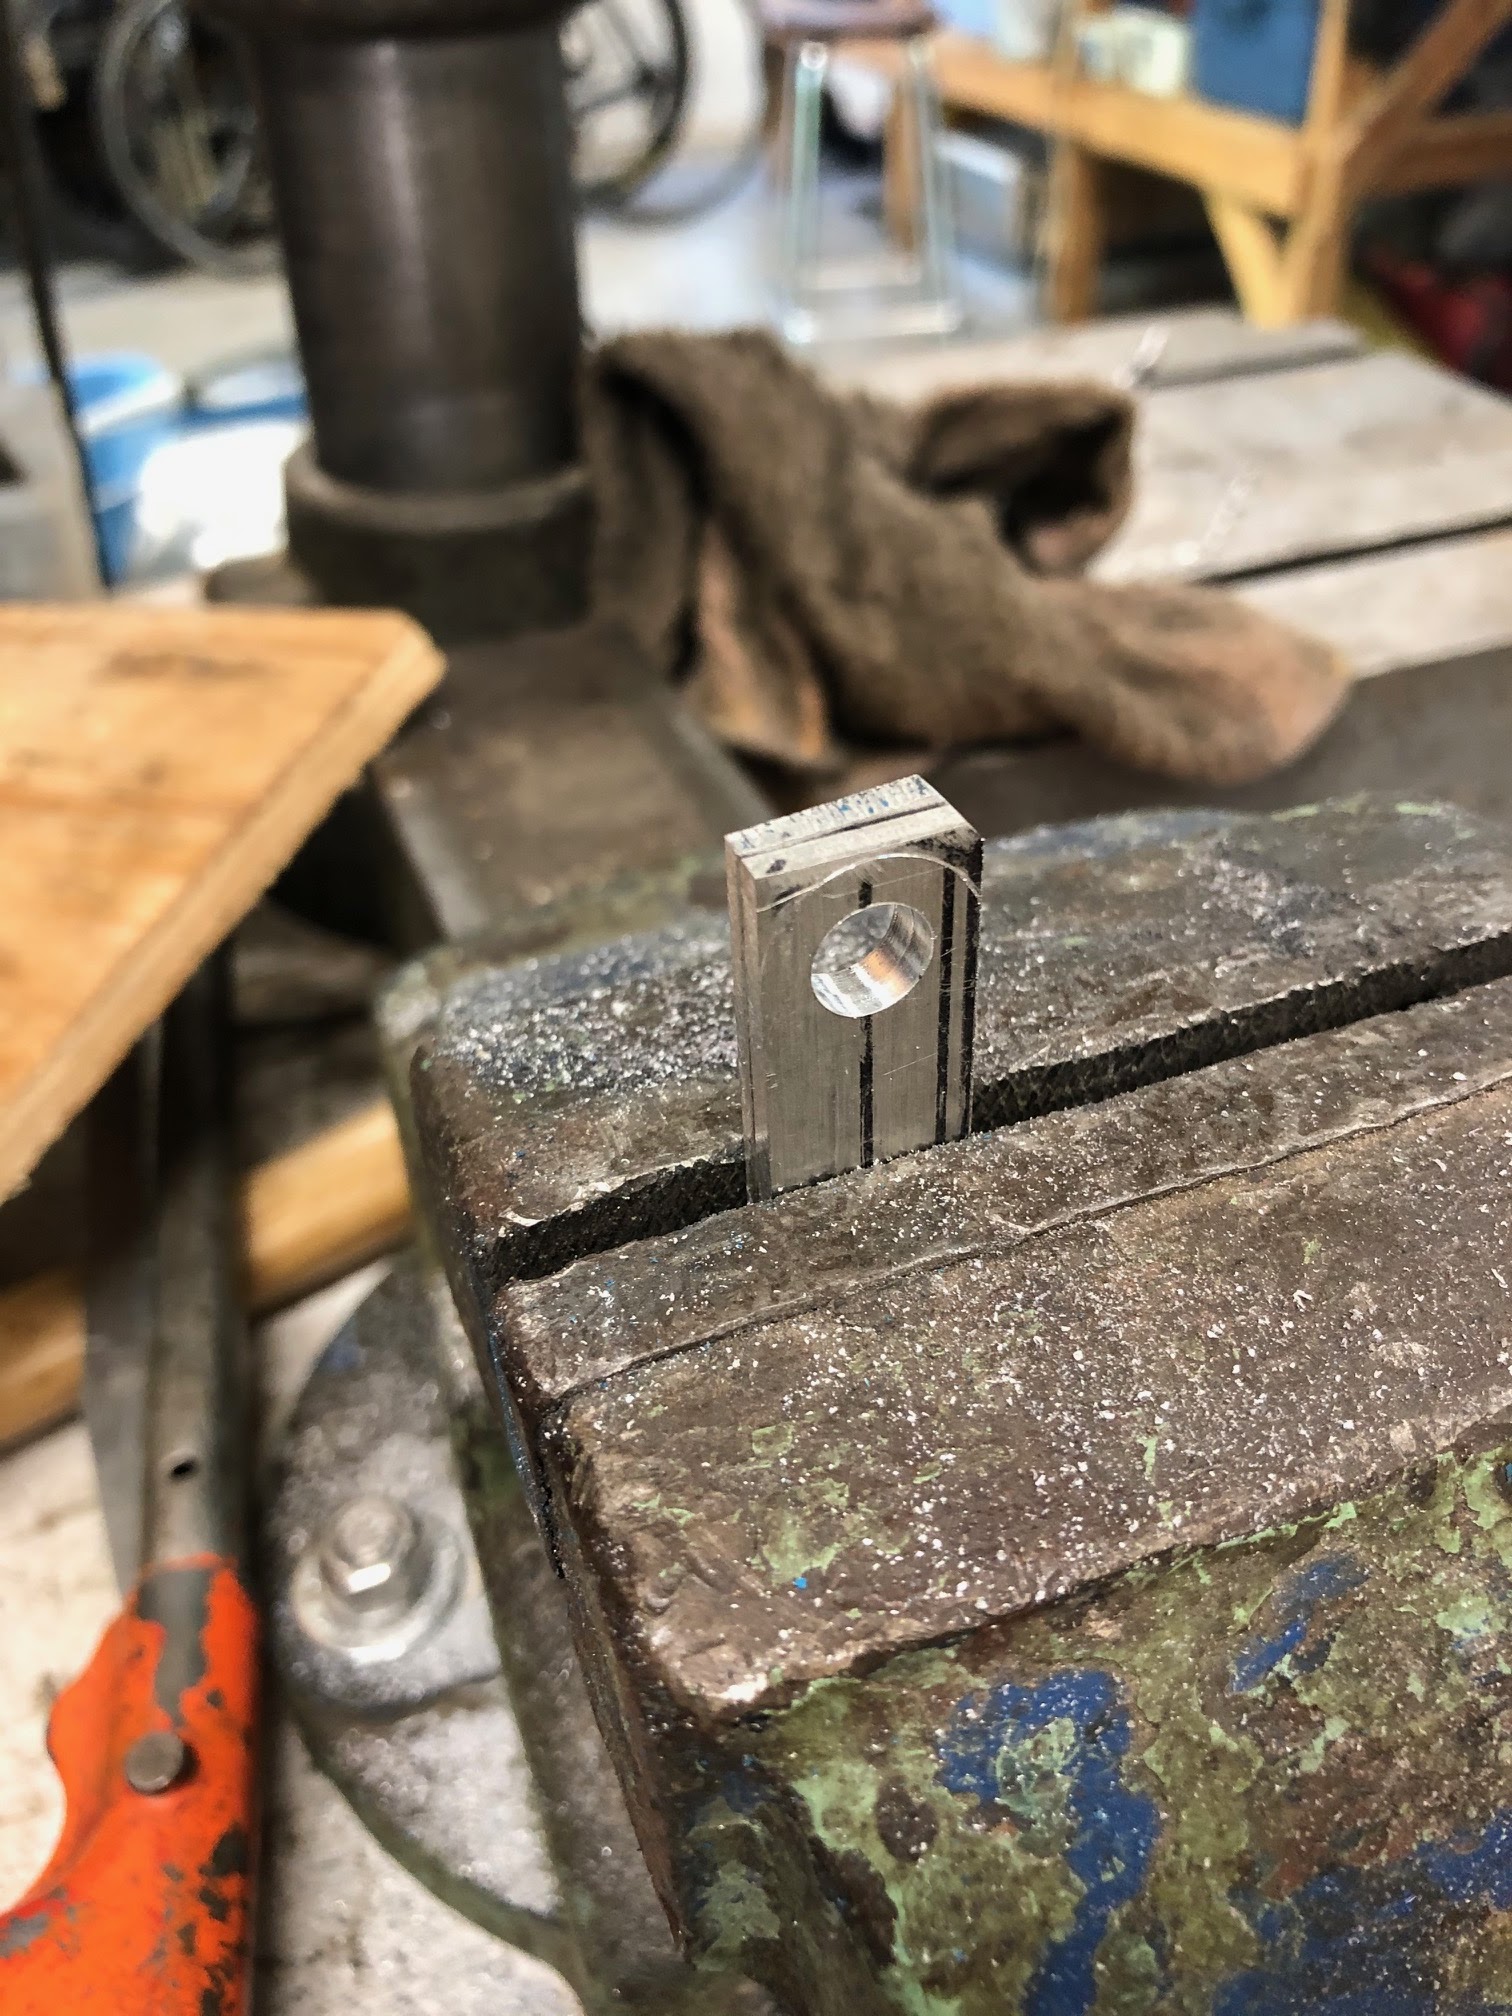
Waiting at home was a bunch of other farkles I'd ordered early in the hopes the bike would arrive soon. Didn't want to get skunked later, when everyone else got their bikes and started clearing out stock. Some of the bits on order or installed include:


Here are some pics of the PC-8 installation, to which I've wired all my accessories as well as a charging plug and heated jacket plug. The voltmeter is attached with double-sided tape.


Haven't decided on a pannier rack yet--either the Touratech or Outback Motortek. Rackless luggage would be nice, and Mosko Moto's Reckless 80 v3 looks great--but it would cost over $1000 by the time I factor in the exchange rate to Canada. Also looking at the Giant Loop Siskiyou panniers since I like having the weight low, and it would be great to get almost everything off the seat except for maybe a RotoPax. In future posts I'll review all this stuff and why I chose each item.


The Tenere has a 1000km break-in period where you're not supposed to exceed 5000 rpm for any lengthy period. Then you change the oil and keep it below 6000rpm for another 600km. Here are my thoughts on the bike after 500kms, after coming from a WR250R (which I still have, with 43,000km of dualsport riding on the clock) and a 2019 Africa Twin (which I sold after only a few weeks and about 3500km of mostly paved riding).

The engine is smooooooth
It's like an electric motor: lots of torque off idle, very easy to control, utterly predictable. Easily the nicest engine I've ridden. Makes me a pro dirt-rider without effort: lean the bike, weight the outside peg, lean over the front wheel, add some throttle, and feel that back end power slide around the corner in perfect control. It's like magic. I never really felt this type of connection with the WRR--it doesn't corner nearly as well as the Tenere. And the Tenere sounds so good, even with the stock exhaust.

As others have also pointed out, throttle control benefits from taking out the cable slack. I didn't find anything twitchy with the throttle as some have complained; it's just smooth-as-snot power when rolling on the gas.

The suspension is clunky
Yeah, there's a lot of talk about the suspension being unrefined out of the box, and I have to agree. I gave my WRR a professional tuning for valves, springs, and oil, and it totally transformed the handling offload and with baggage. No reason why the Tenere can't benefit from some similar attention. I've installed the pre-load top caps but haven't installed the shock spring or really played with settings. Will do that once the spring's in, and then this fall I'll send the whole bike out for a proper tune. It's money well spent in my experience. For reference, I'm 195lb/86kg without riding gear on, and the stock spring (69 N-mm) is aimed at riders weighing 60-65kg carrying no luggage.

It's super easy to work on
One of my complaints with the Africa Twin was how hard it was to open up and work on. Changing the air filters required stripping dozens of fasteners and fiddly bits of body work, and even though I'd done it a few times, it still felt like a 2-hour job each time. Must've been designed by a car engineer. By contrast, the Tenere seems to have been designed by a motorcyclist. The panels are thoughtfully attached, and it's easy to strip and reinstall without having mysterious hardware left over. I can have the forks off, opened at the top, and reinstalled in the bike in 45 minutes. Removing the rear shock can be done in about 10 minutes, and doesn't require removing the rear wheel or other components besides a mud flap and two side panels. It's a cinch.

The stock seat is tolerable
Coming from a Seat Concepts on my WRR, and a comfy couch on the Africa Twin, I was worried the Tenere's perch would be rock hard. It's not too bad actually - I rode 350km of paved and dirt roads today over 8 hours, and was only feeling a bit antsy at the end. Nevertheless, a taller seat would help open up my knees a bit, which are more bent than on the WRR.

Handlebars need to be tilted forward a bit
Not sure if they are set at the factory or by the dealer, but several people have reported the need to tilt them and I'd agree. Results in less wrist strain.

Tires are surprisingly good
Coming from full knobbies, I was expecting to slide around more in the dirt given the svelte profile of the stock tread on the Tenere. However, they are great on pavement, and hook up much better and more predictably than you'd expect on loose dirt, sand, and gravel. On the Africa Twin, I always found it tended to plough the front end when turning on loose stuff, so I was expecting something similar for the Tenere. Not so: both the front and rear handle with balance and a clear sense of the limits, and like I said earlier, a simple twist of the wrist is all you need to break loose the rear and turn with confidence.

Wind noise is tolerable
At 6'-1"/183cm, I'm too tall to hide completely behind the windscreen. Nevertheless, even though the redirected air hits the peak of my Shoei Hornet, it doesn't buffet me. This is a major improvement over the Africa Twin, which had (for 2019, at least) a notorious blast up the fork-tunnel, and required a baffle to redirect the flow or the bike was practically unrideable above 50km/hr. On the Tenere there's a steady rush of air past my helmet, but not so bad I can't listen to music on my headset (with ear plugs in).

Fuel economy
Following the Ryan F9 break-in method (which I've done for all my bikes and cars) has worked great for longevity, although all that accelerating takes a hit to fuel economy. My low fuel indicator flashed at around 200km, and I filled up at around 225km with about 12 liters into the 17 litre tank. The manual says the low fuel indicator flashes at around 4.3 litres, so no surprises here. Once everything's broken in, I should easily be able to get 300km to a tank, and with a 1-gallon RotoPax, that'll give me plenty of range for the trips I do.

Weight and handling
It was a surprise to discover the Tenere feels less top-heavy than it looks. While it's no 1250GS in the centre of mass department, it's certainly not like my old KLR and handles its weight very well. I never felt tippy in the dirt or when doing tight maneuvers on pavement. Amazingly, it feels almost the same as the WRR--just a little heavier--but not as heavy as the WRR loaded with gear. And it feels waaaaay lighter than the Africa Twin--even when it had nothing on it. The Tenere truly feels like a slightly larger version of the WRR, with so much more power and real brakes. It's less tiring to ride, has a good view of the front wheel (unlike the Africa Twin, which felt like navigating a boat), and feels slim and dirt-bike-like at the waist. It's easy to flat-foot. Paddling the bike backwards on dirt can be tricky--that's one area where you notice the weight over the WRR. However, my net impression is I'm getting about 60-75% of the WRR's capabilities, but with tons of power to make up the difference. Has me questioning whether I should even keep my trusty old WRR. Let's reassess at the end of the riding season.

Overall
Zero regrets, tremendous fun to ride. Biggest issue is the suspension needs tuning, but I expected that. The power is more than adequate, the handling (even with untuned suspension) is excellent and surprisingly good in the dirt. Tank bag sure is handy but should probably be a minimalist version (e.g. Mosko Moto Pico) or not at all, if you want to really get over the tank for dirt riding and don't want your dangly bits getting slapped repeatedly. Biggest areas to lose weight are the exhaust and battery--as with any bike. On the Tenere, that could shave an easy 5-10lbs from a relatively high location. The benefit of having the bike introduced to North America a good year after other markets is we benefit from the many great accessories already on the market, and the experience of other riders who've now flogged the bike through all sorts of conditions.

Yamaha's created a real winner here, as North American riders will finally get to discover for themselves. The Tenere ticks a lot of boxes for a reasonable price, leaving budget for accessories to suit your own particular needs.